Restoration Road
This is a fix it story.

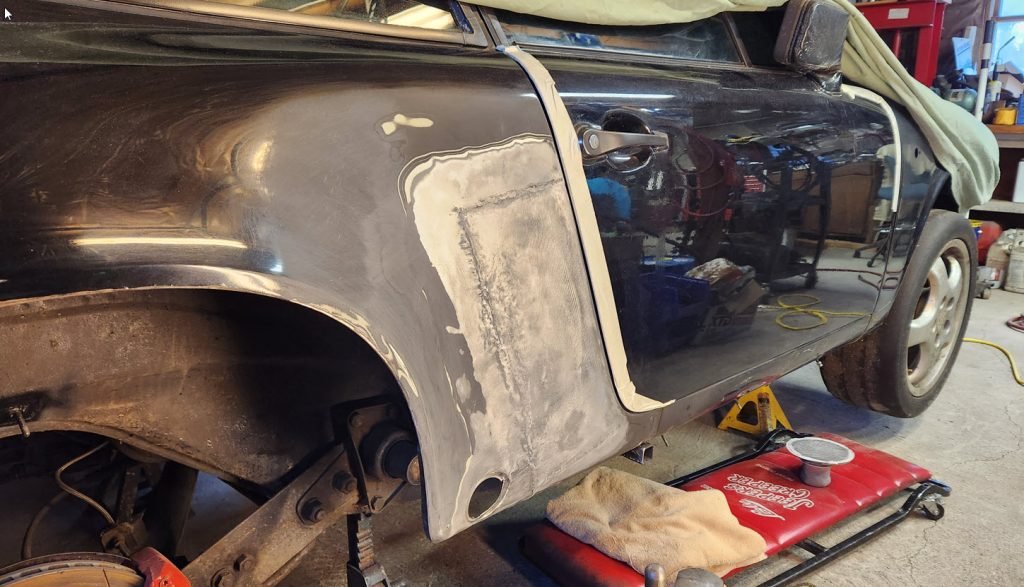
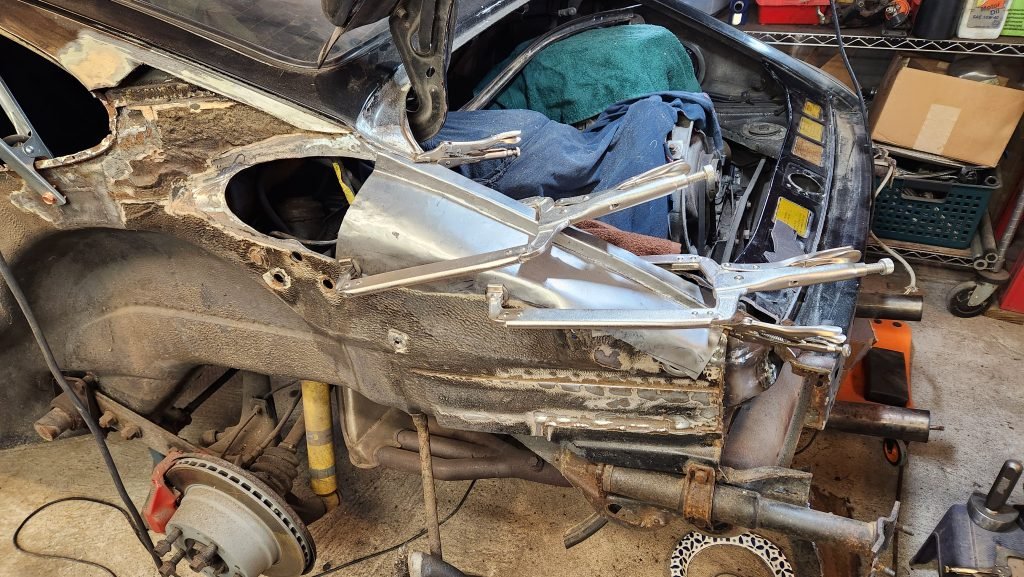
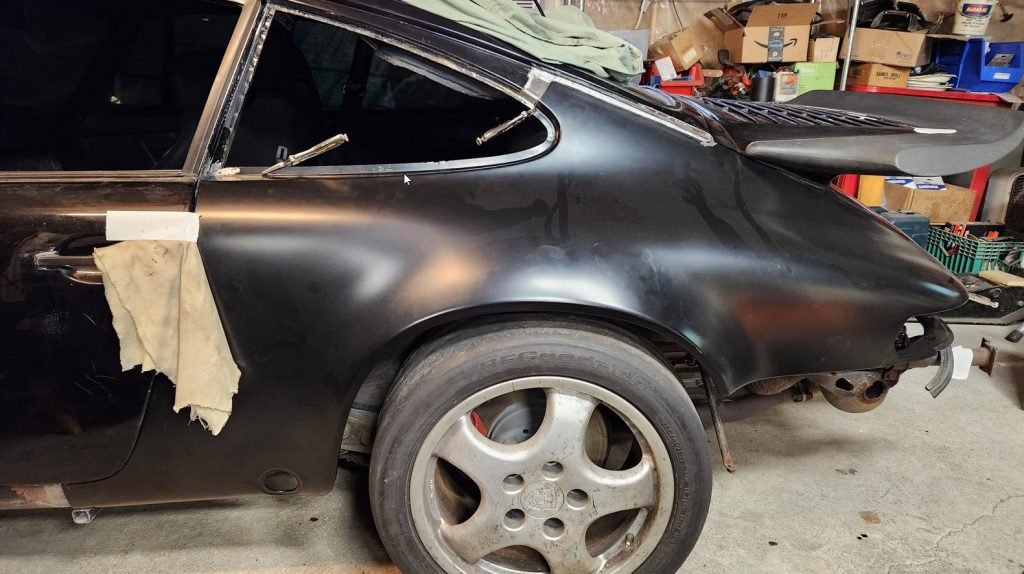
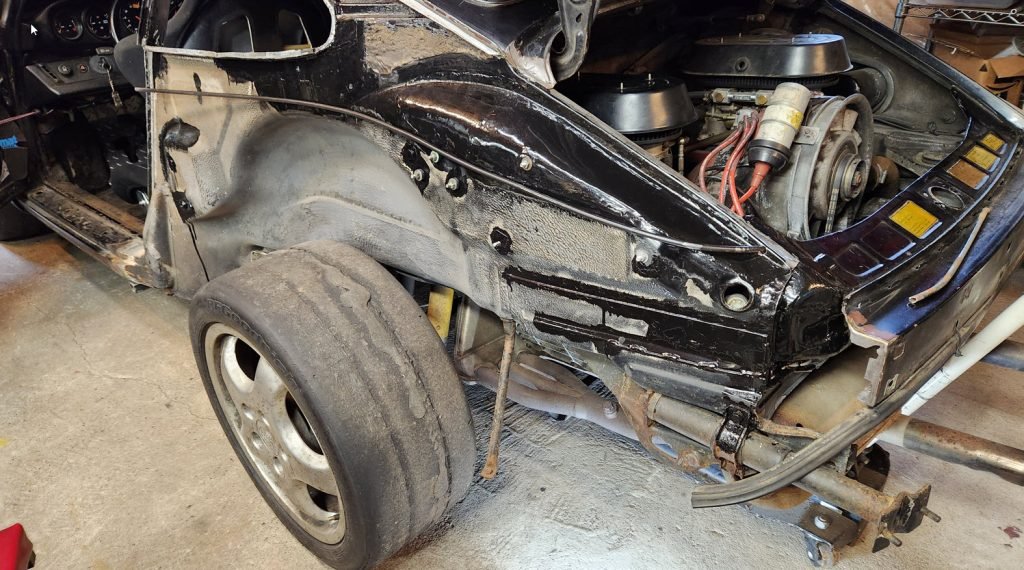
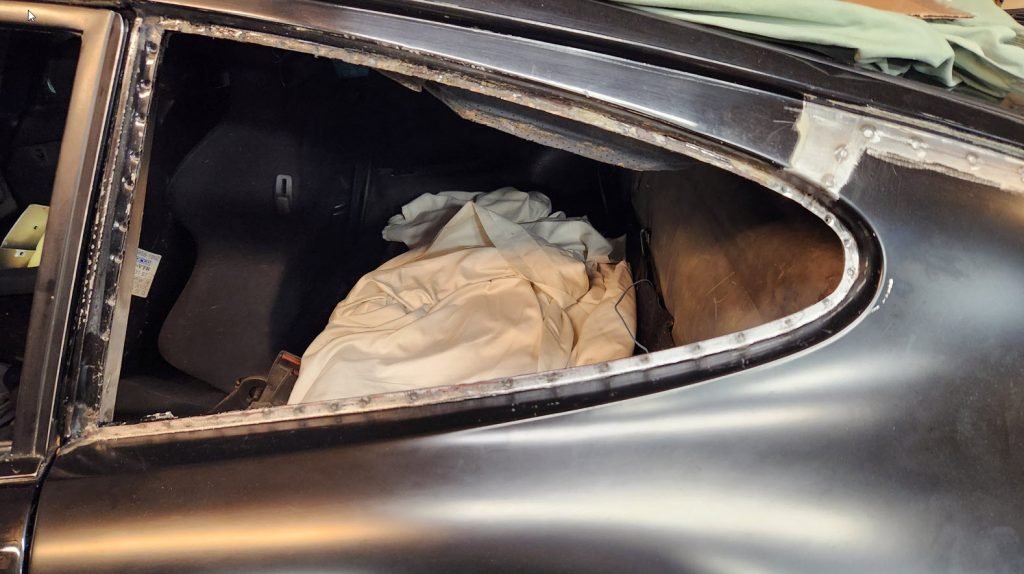
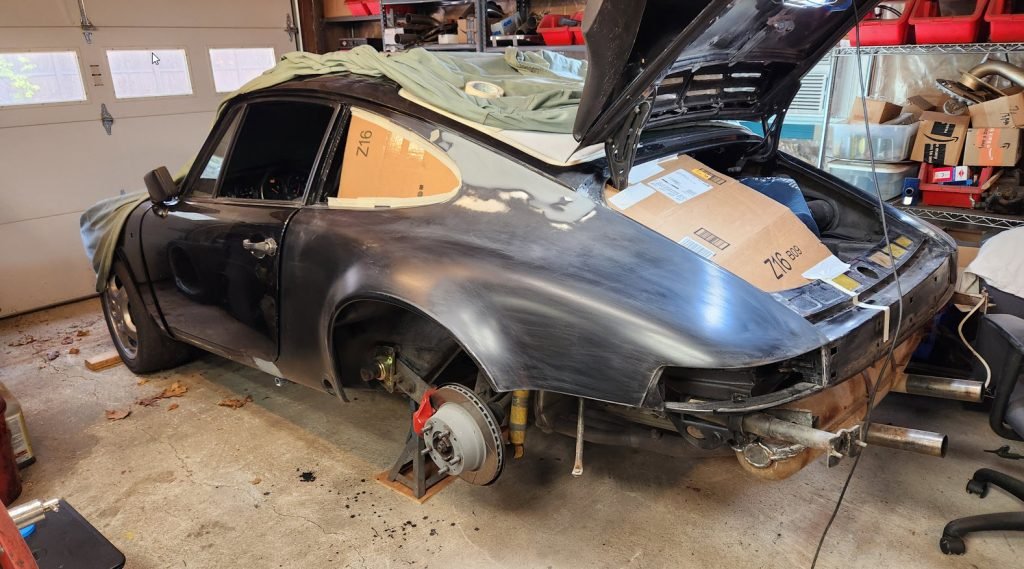
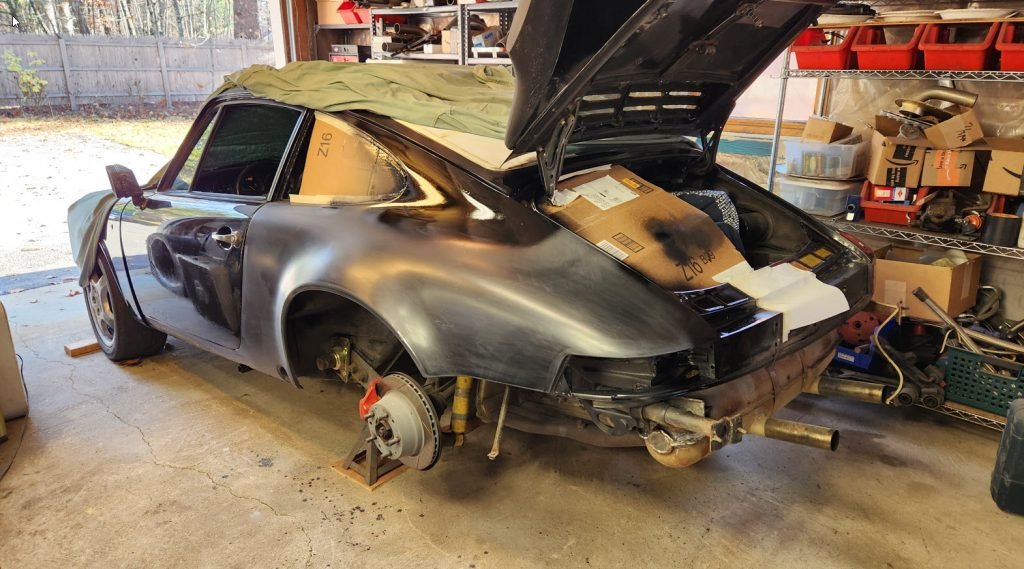
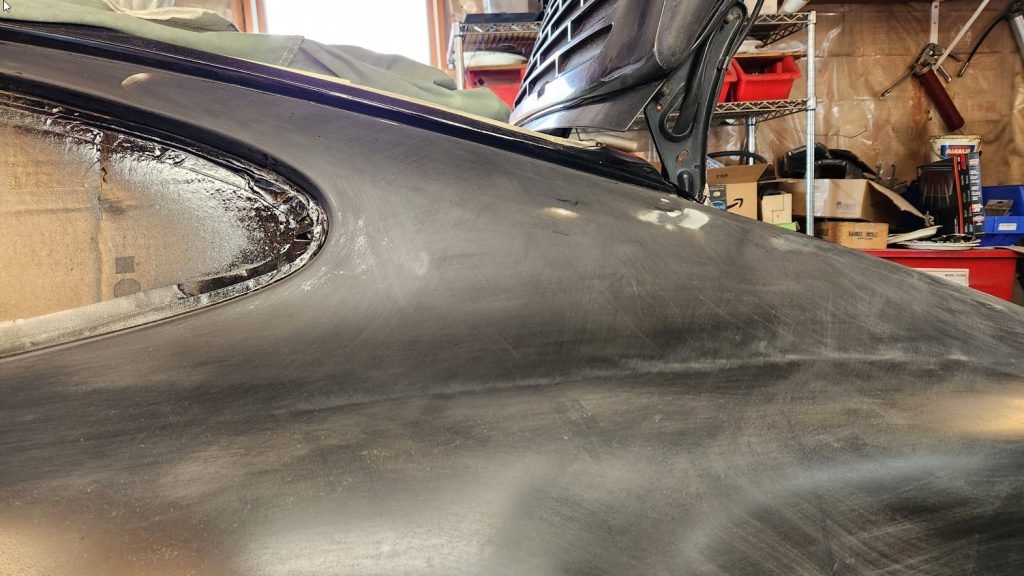
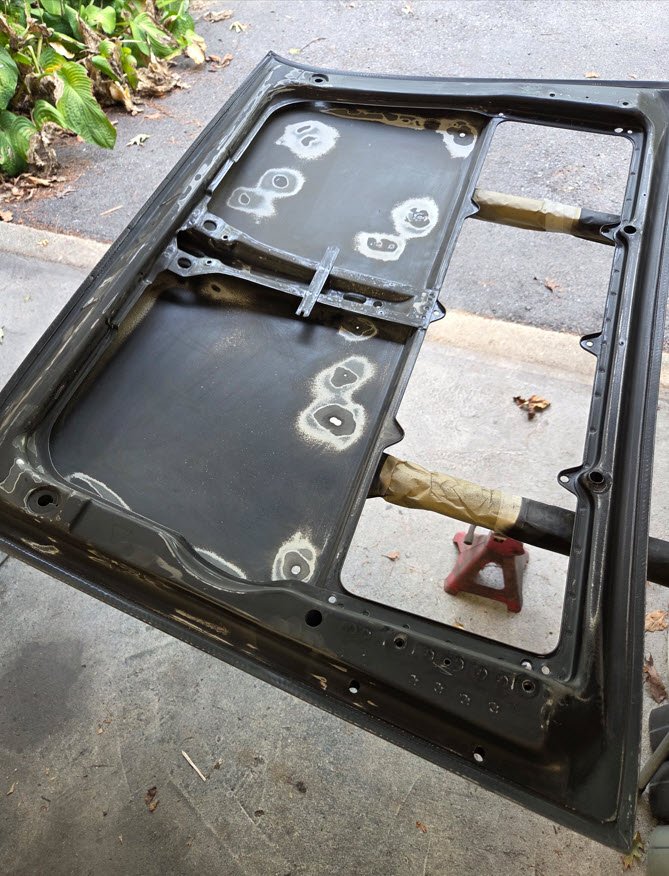
The before (almost) state of the black car, this one is after the front inner fender work. All of the issues were hidden behind bubbling paint. I have taken over 1000 images of the process! The green car is a 1973 RSR with a 3.8 liter 6.
Highlights

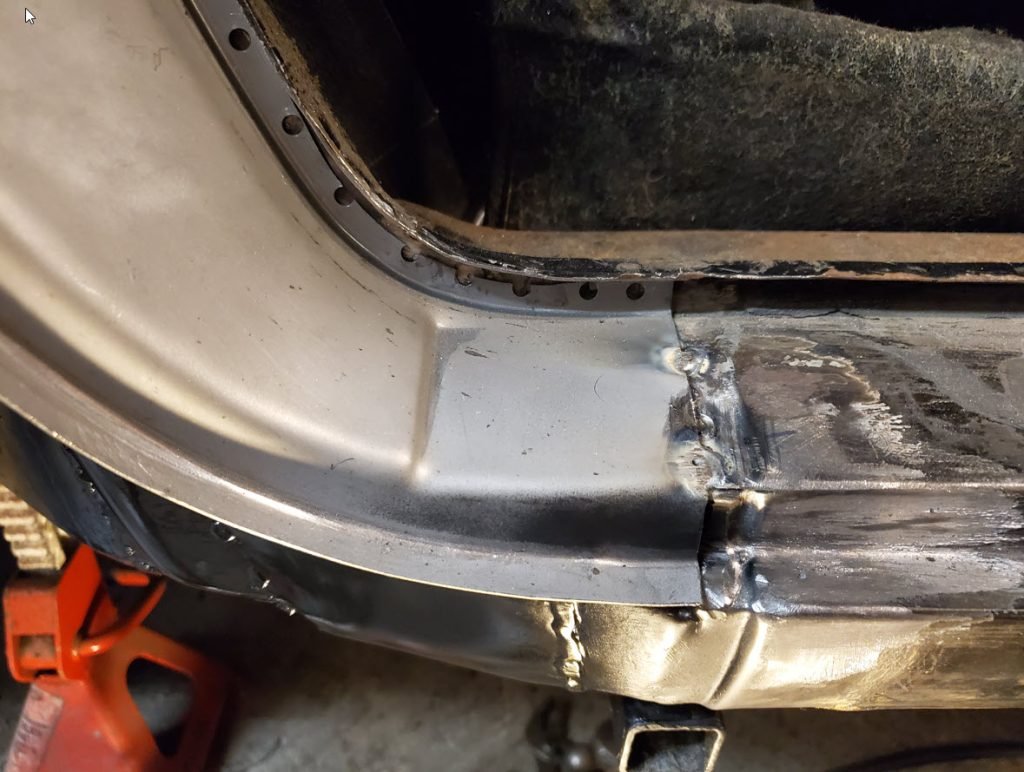
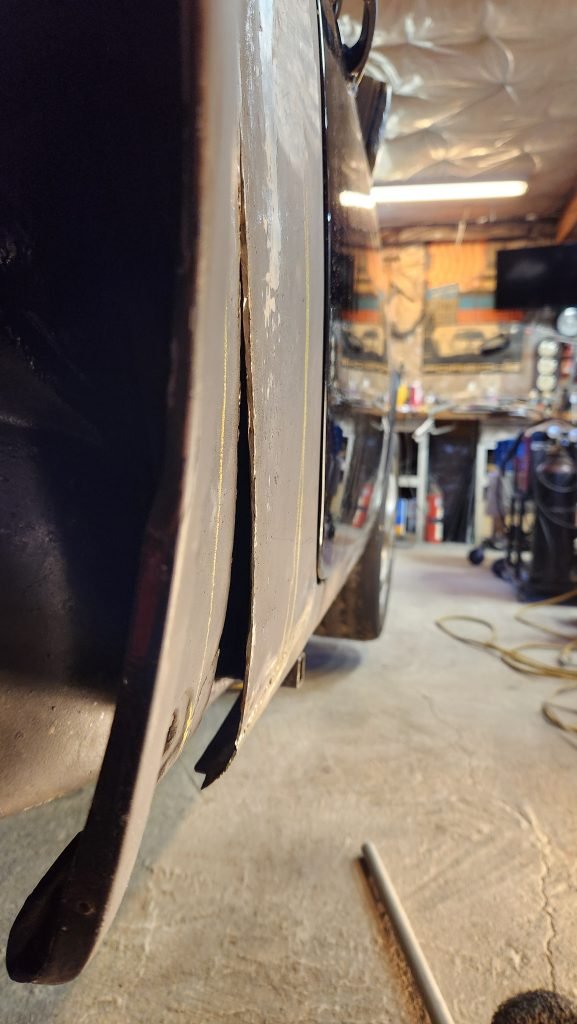
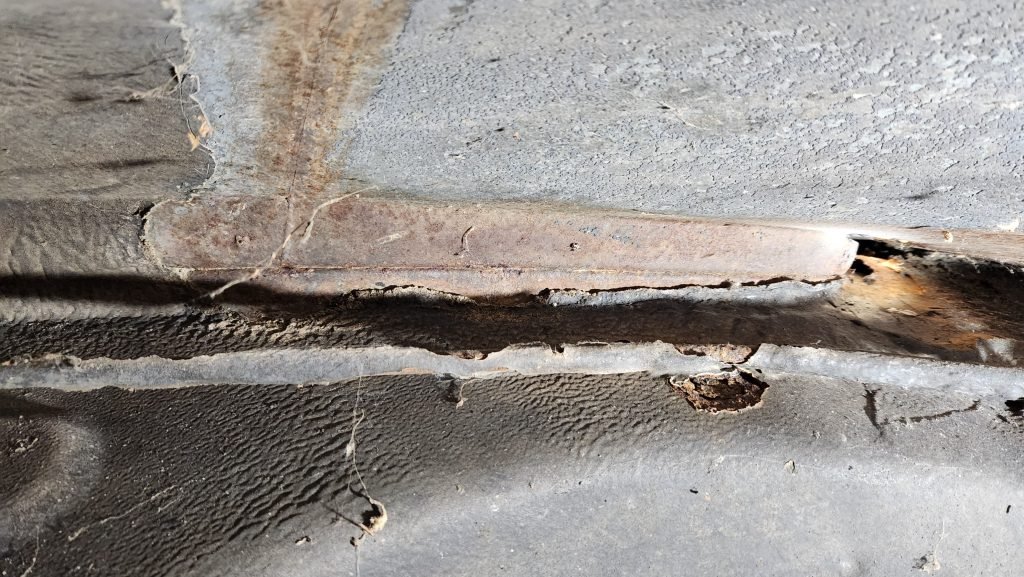
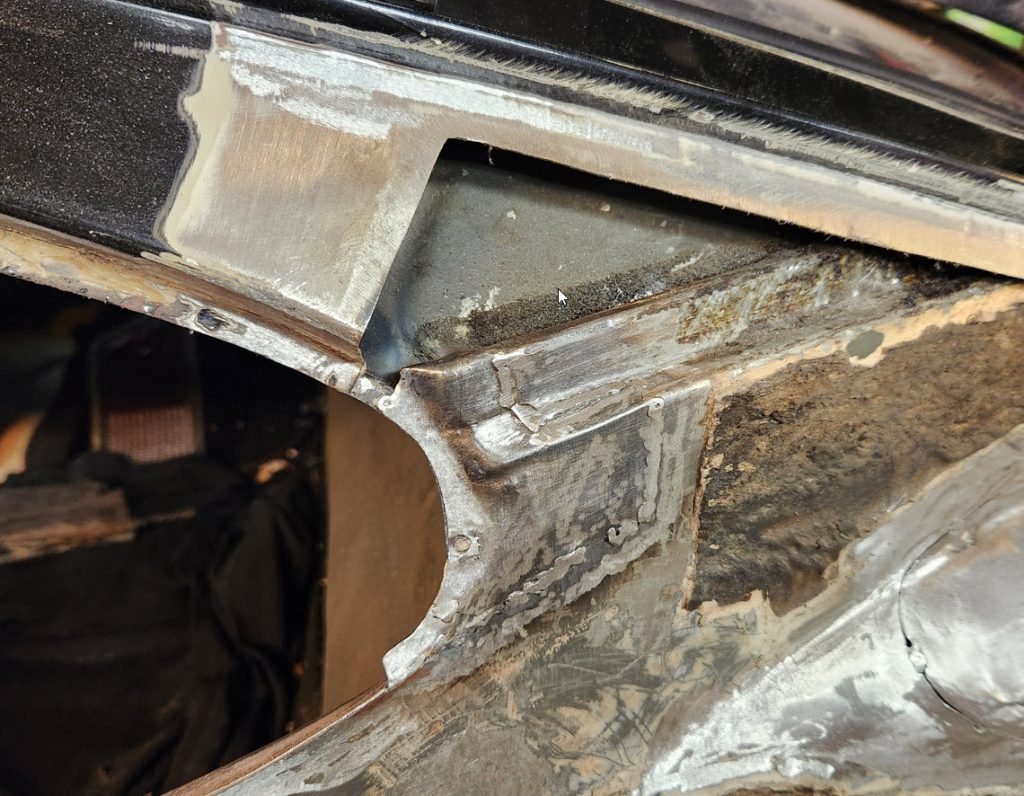
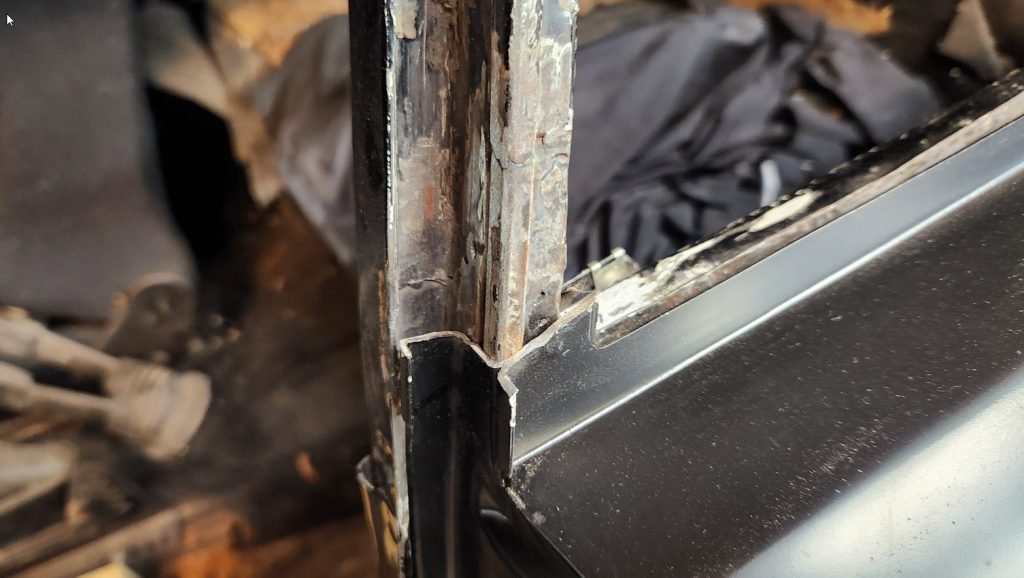
B Pillar
Right side with quarter panel, B pillar and rocker cut. Fitting the rocker extension panel support after fabrication of the inner rocker.

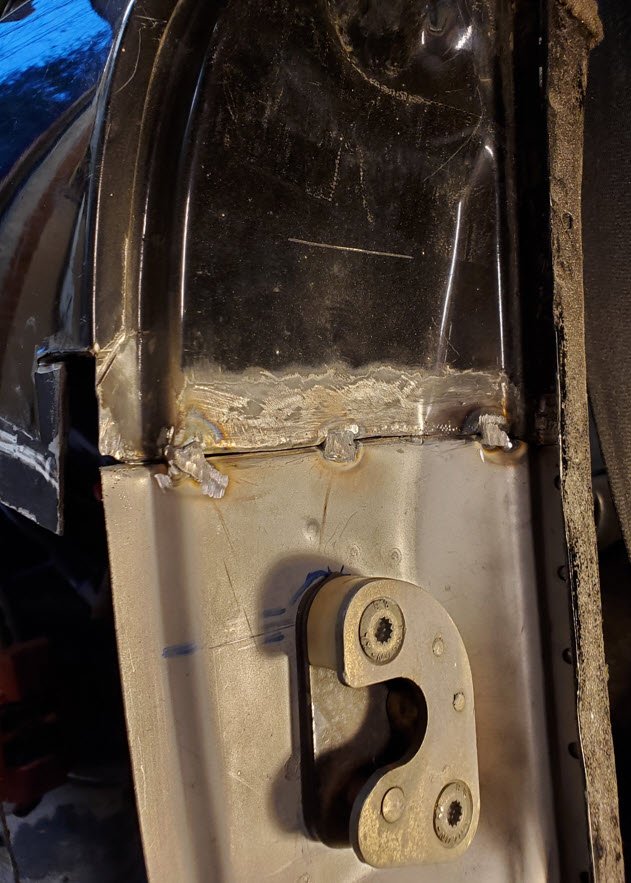
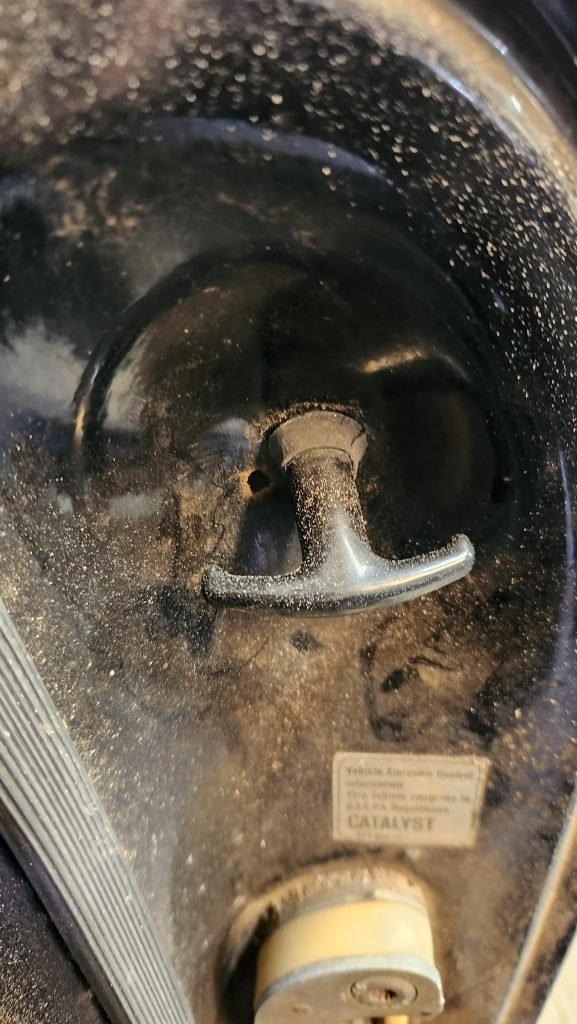
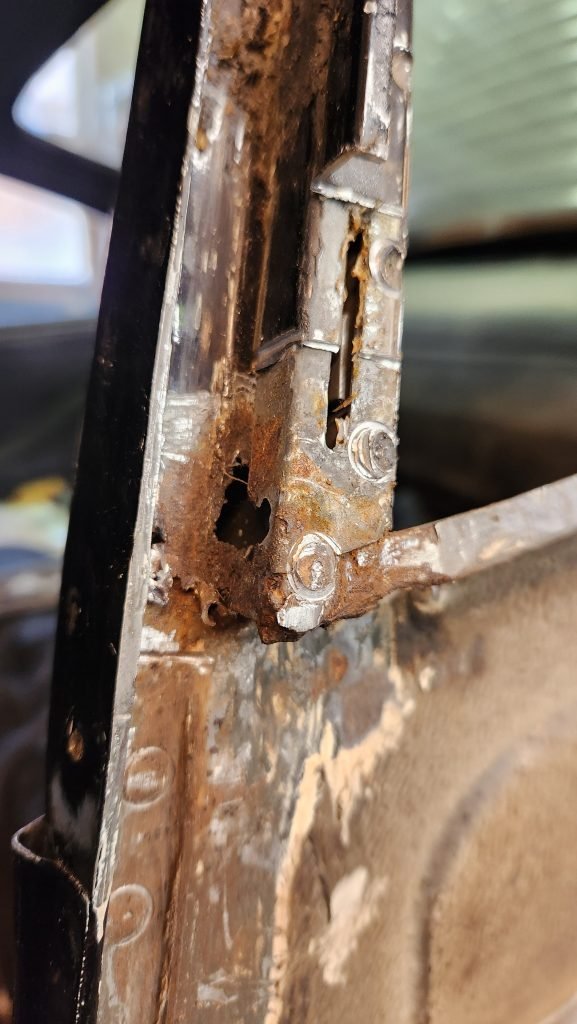
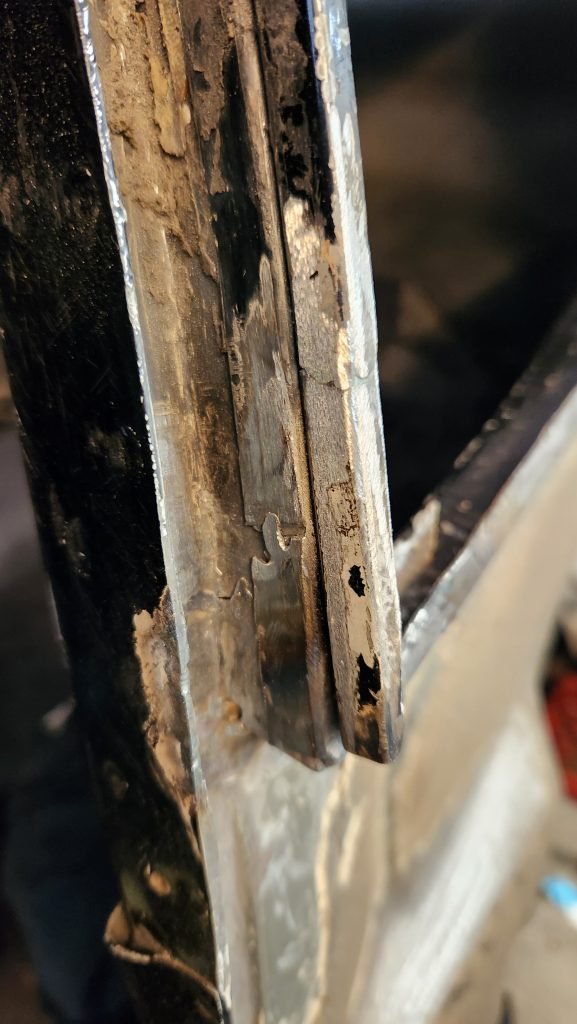
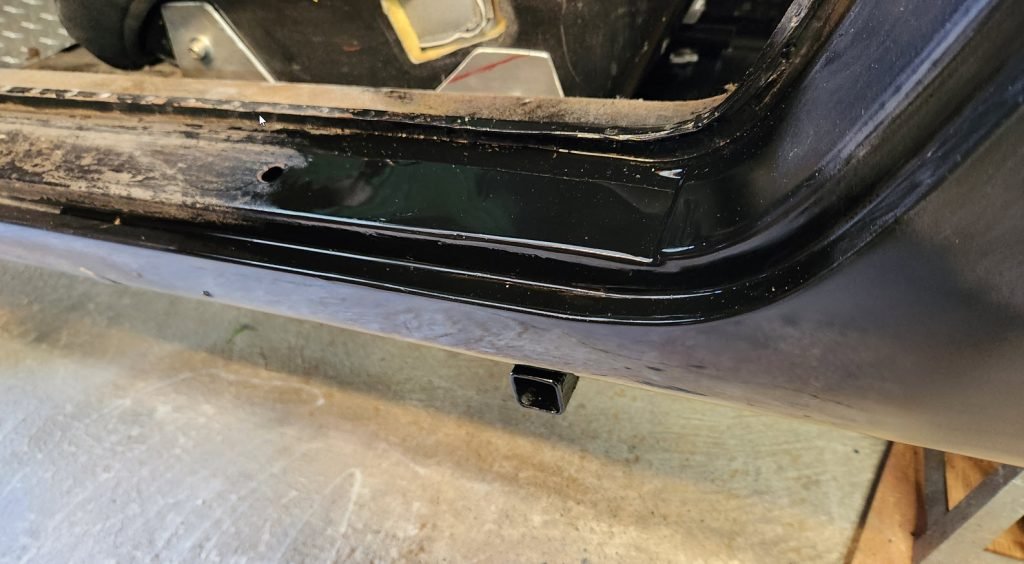
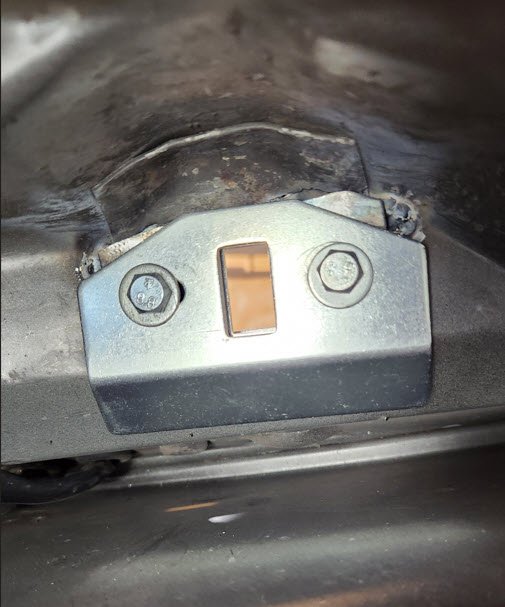
Door opener
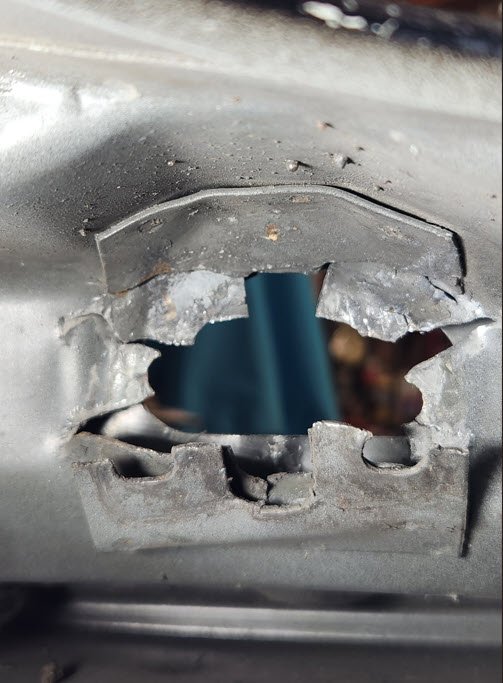
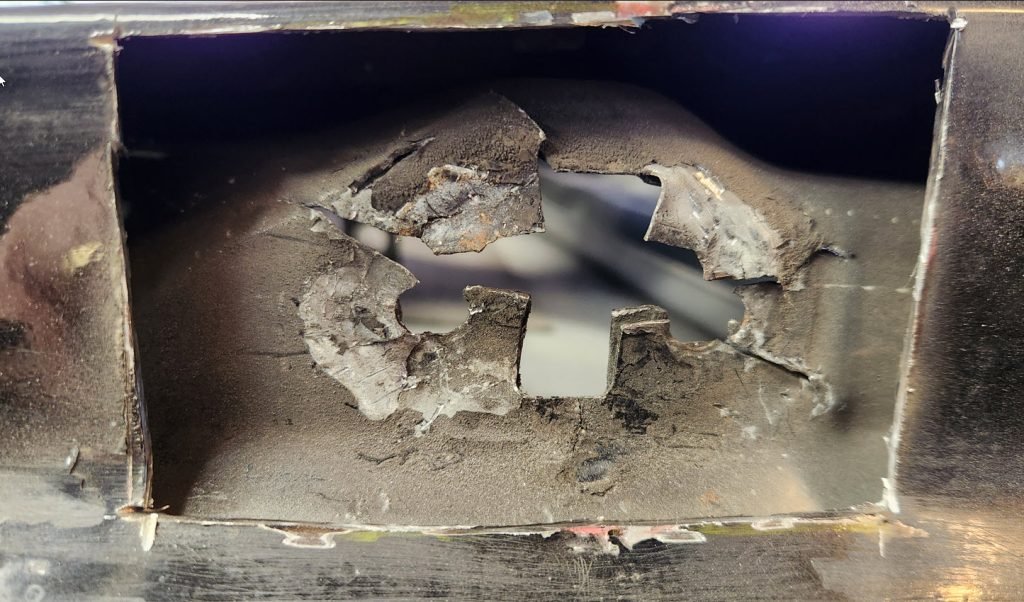
Inside the door view of the door check or what is left of it. Common metal fatigue issue where the door stay lever attaches.

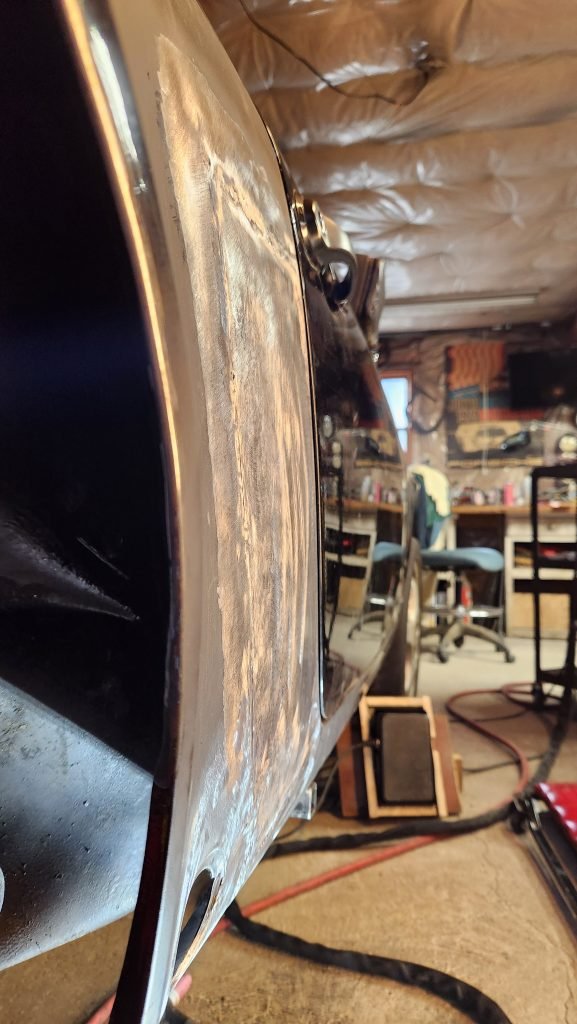
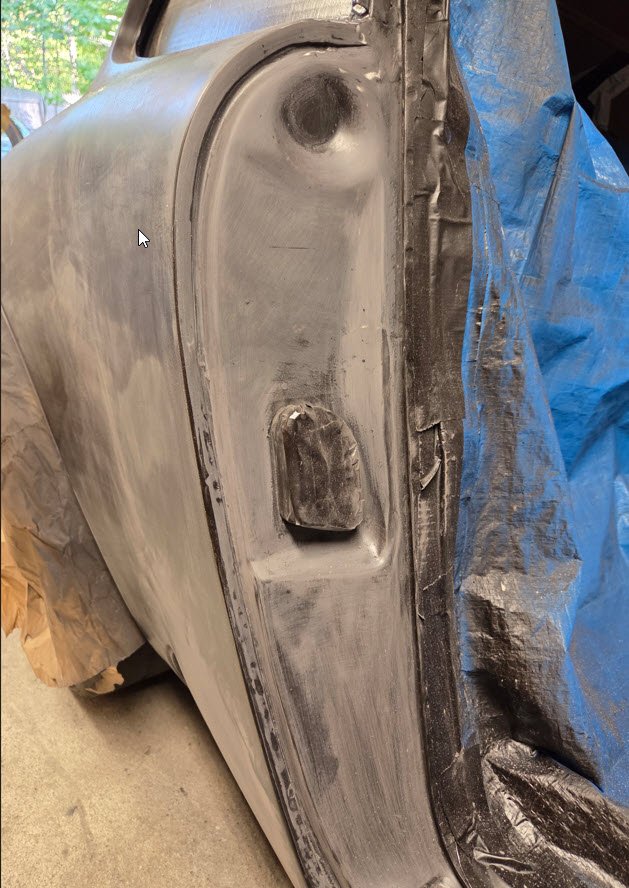
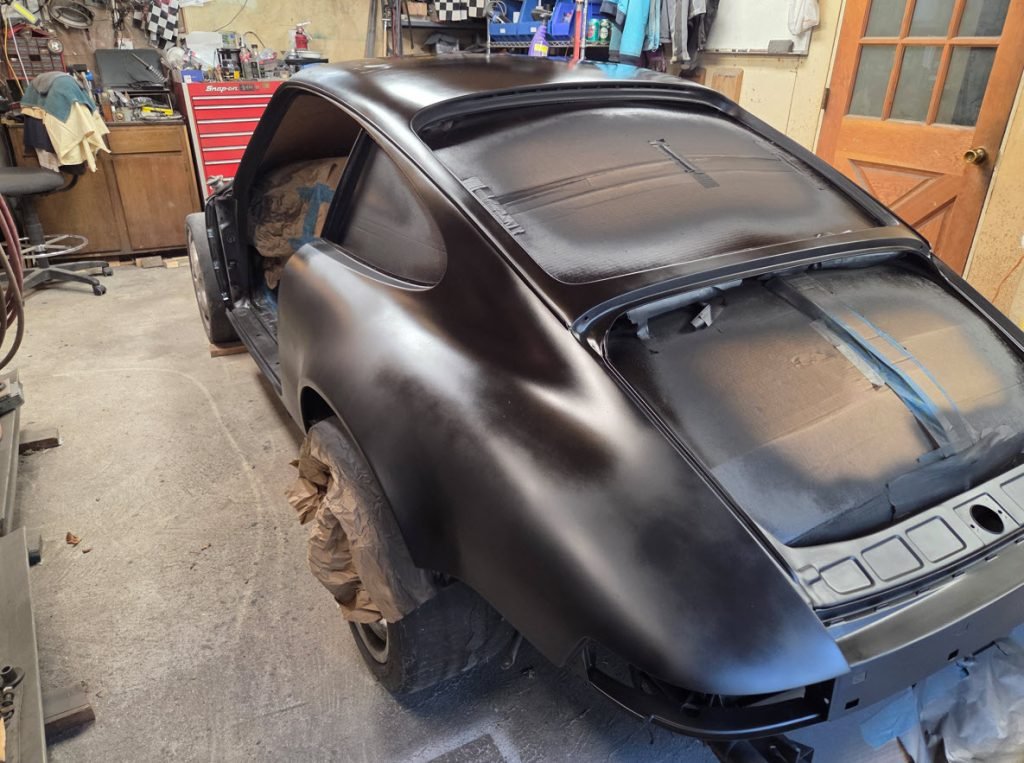
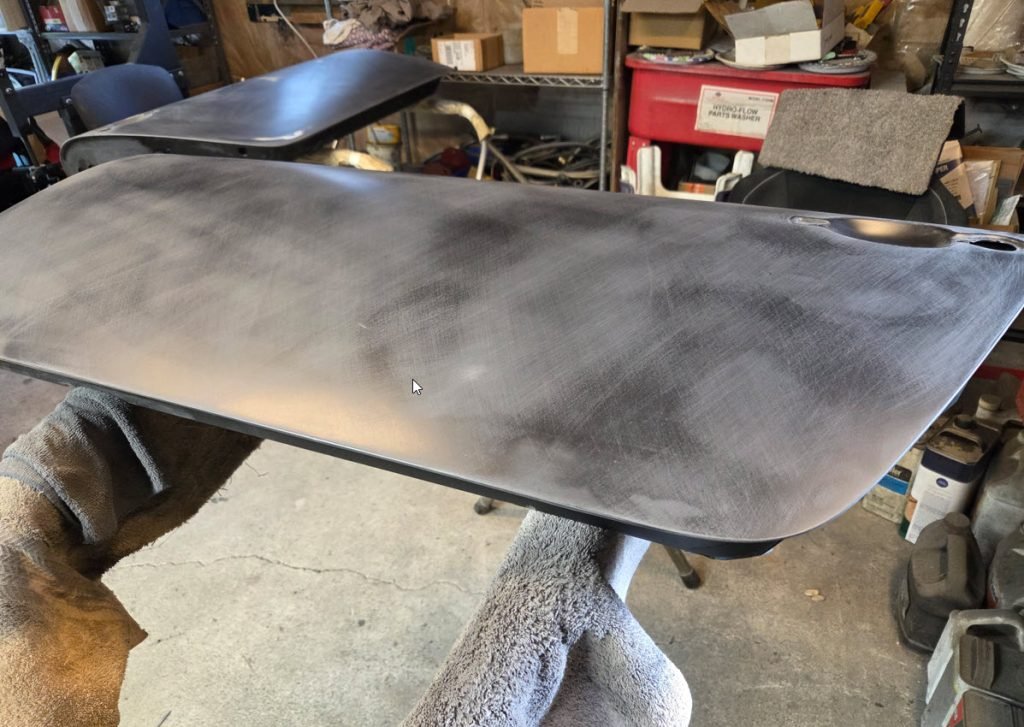
Sunroof delete
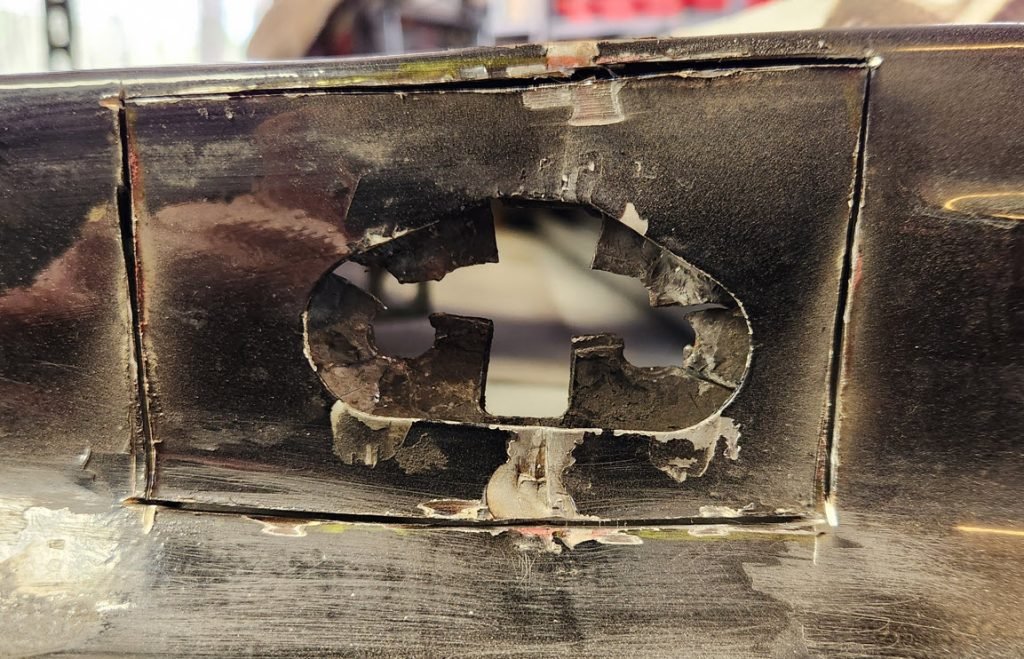
Fabricated a panel with an English wheel and planishing hammer. This complex curve panel weld was challenging!
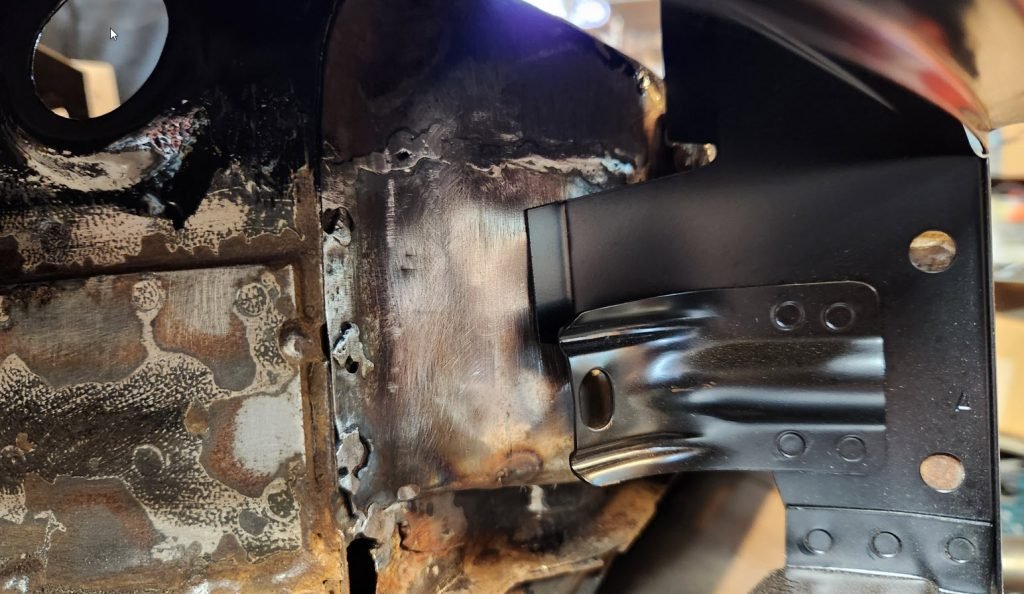
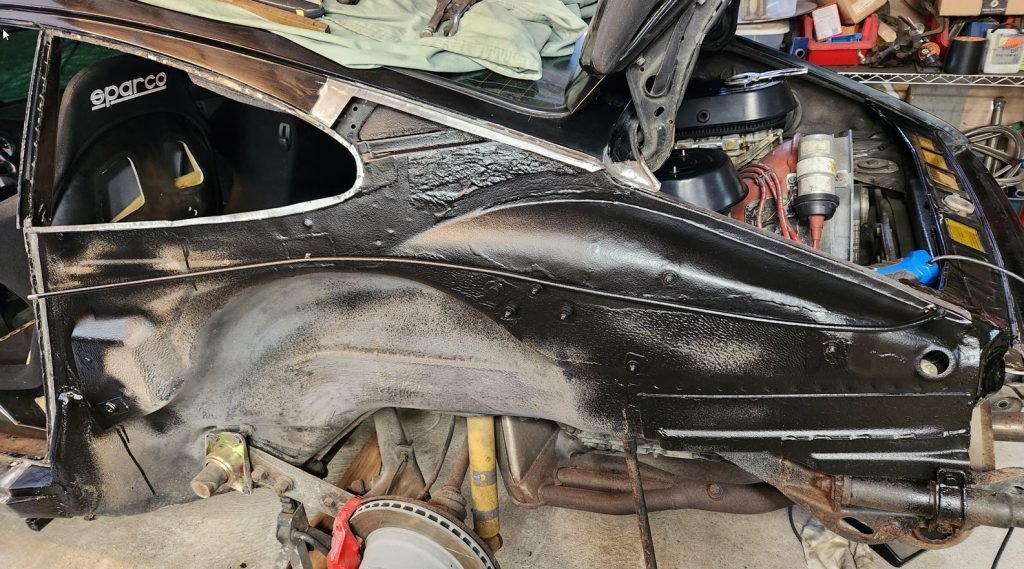
Front Clip
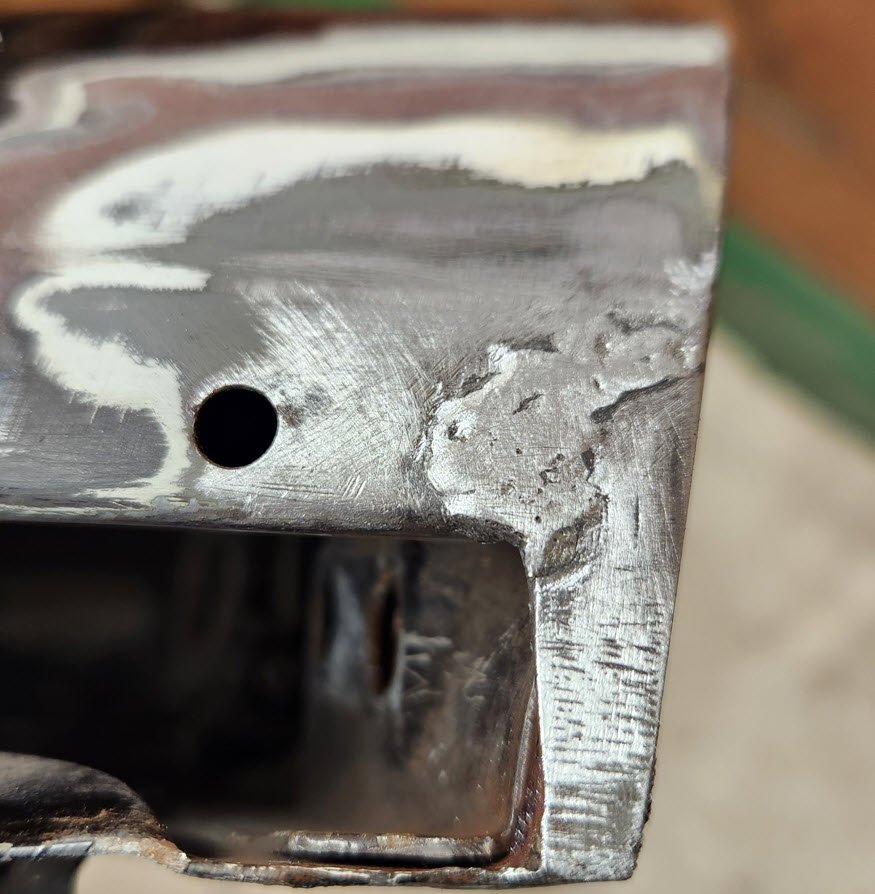
Inner fenders, bumper mounts, front cooler mount.

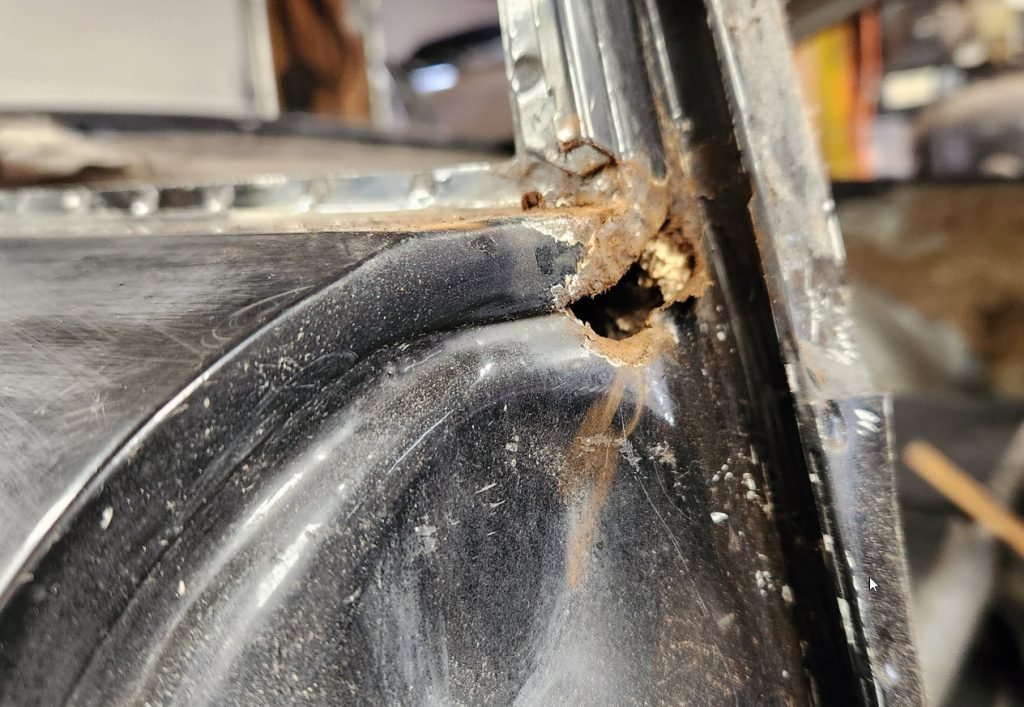
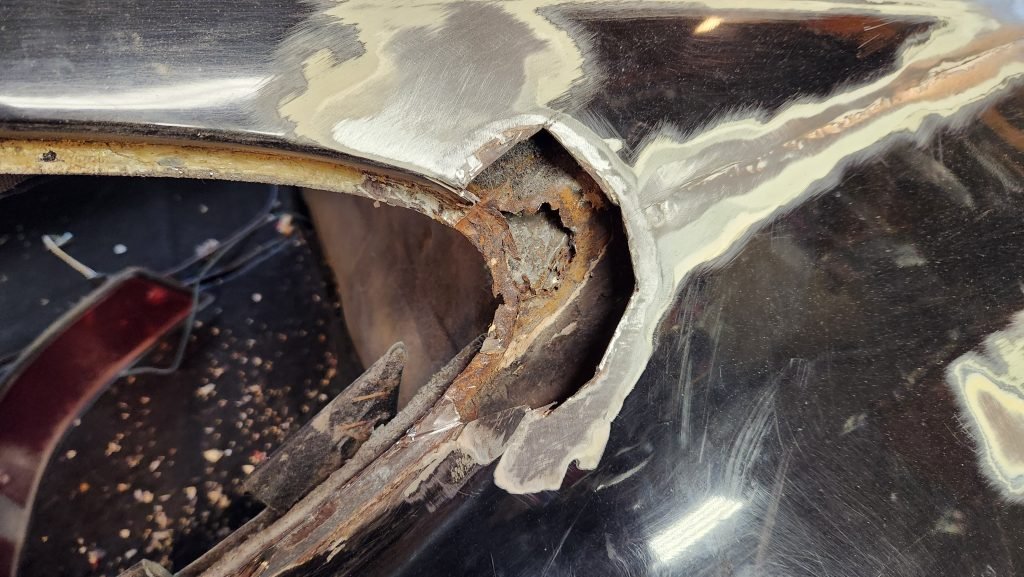
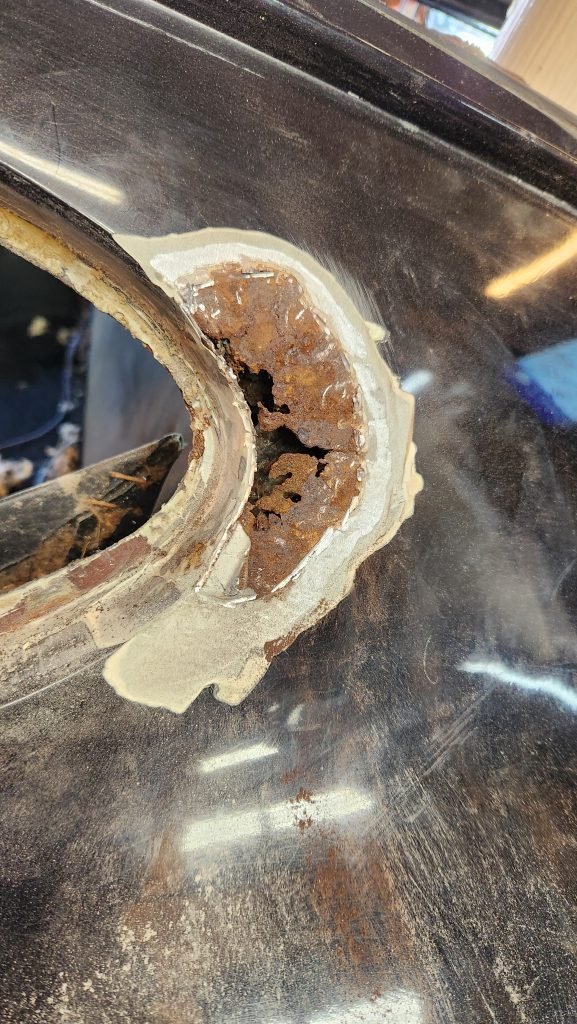
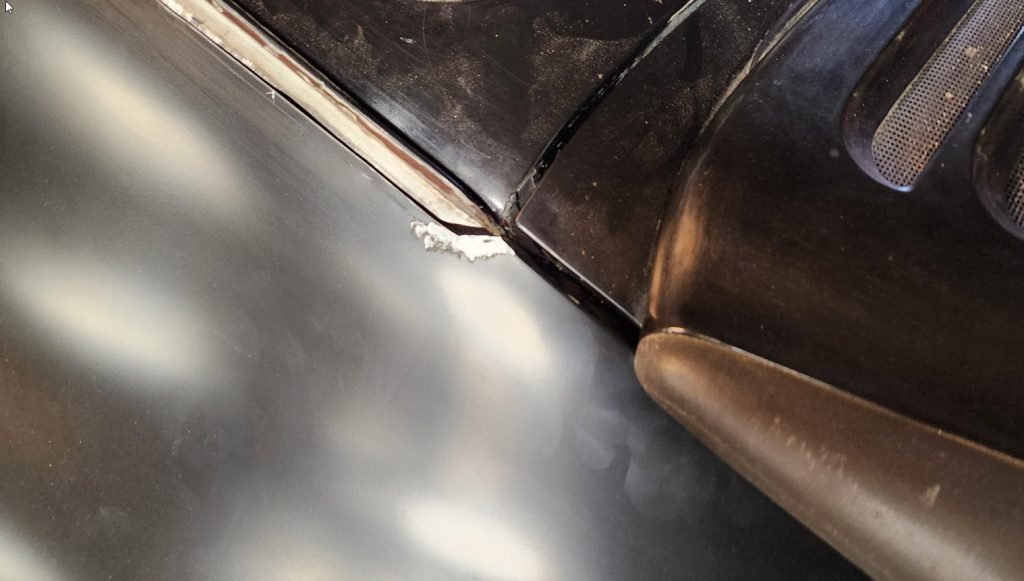
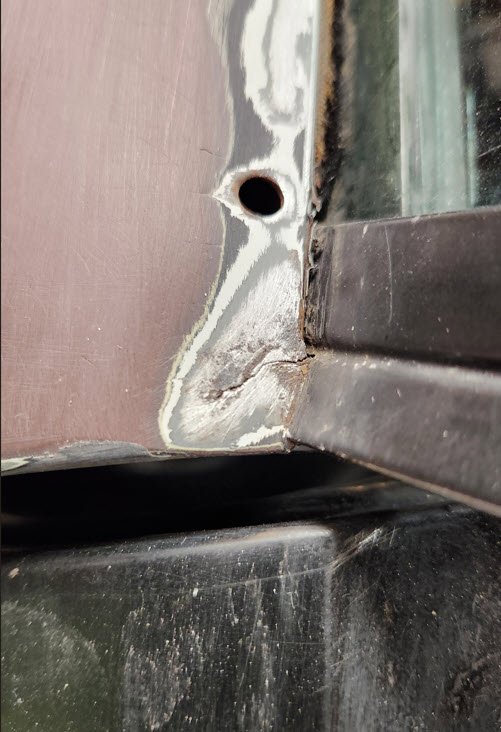
Sand and debris is held by the bumper mount and results in a rust hole.

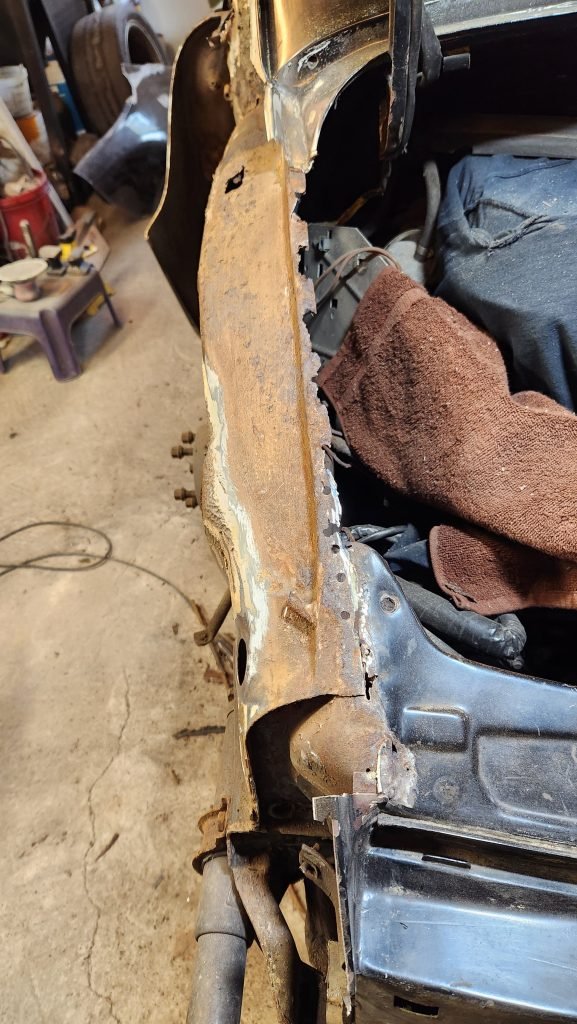
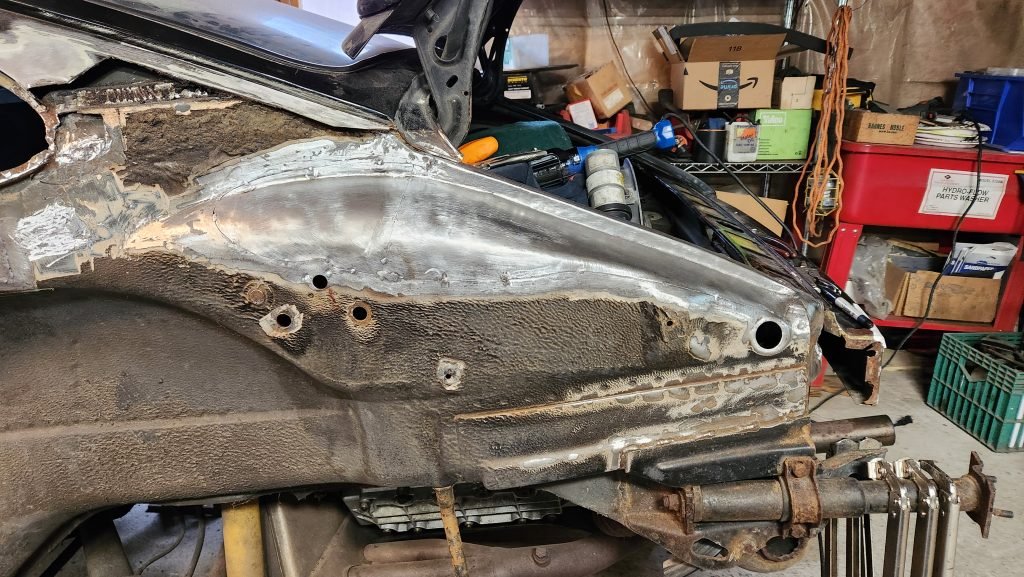
Outside view of right inner wing rust.

Same deal on the left side and the damage continued to the shock mount area.

Cut the rust out..

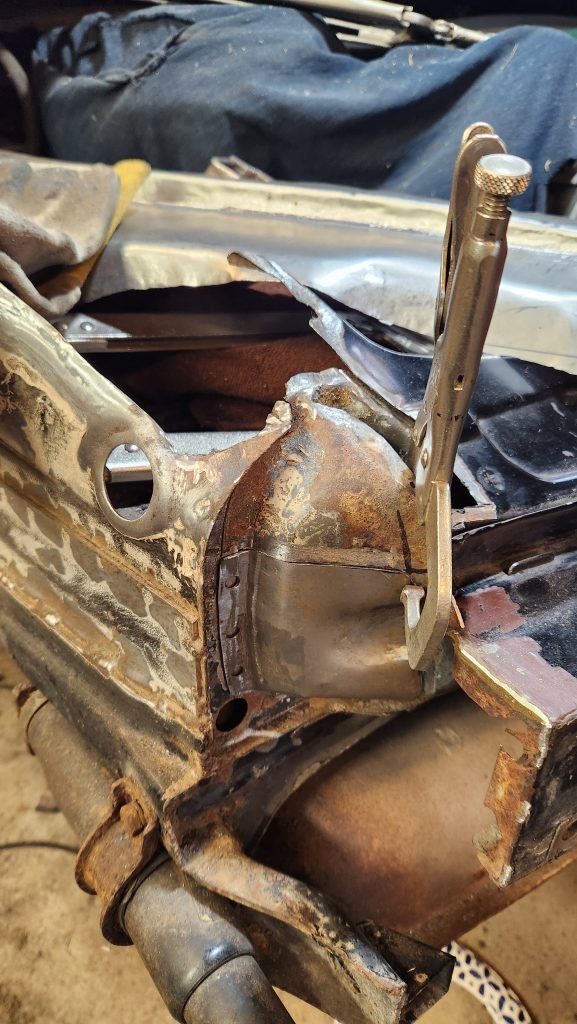
Add fabricated a panel, needed to spot weld the top part to allow fender fit.

Bumper mount spot weld test fit.

After checking fit welded and undercoated.

And the left side too.

And it fits!
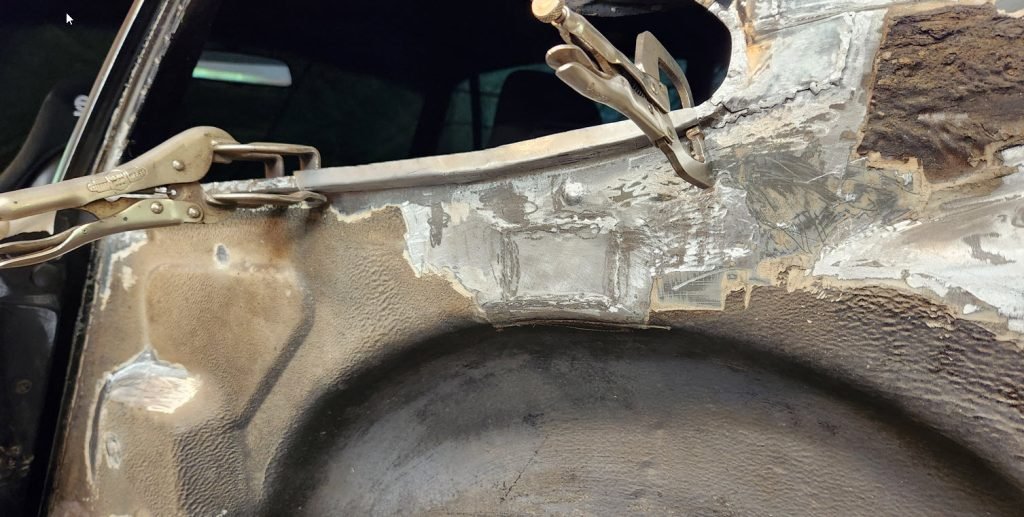
Right rear quarter panel
B pillar, rocker extension, door strike

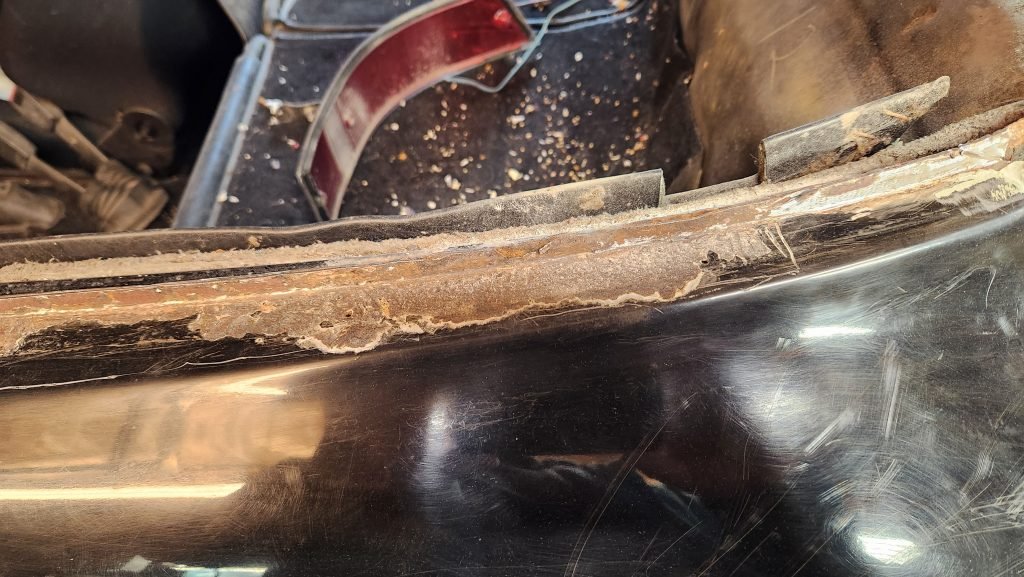
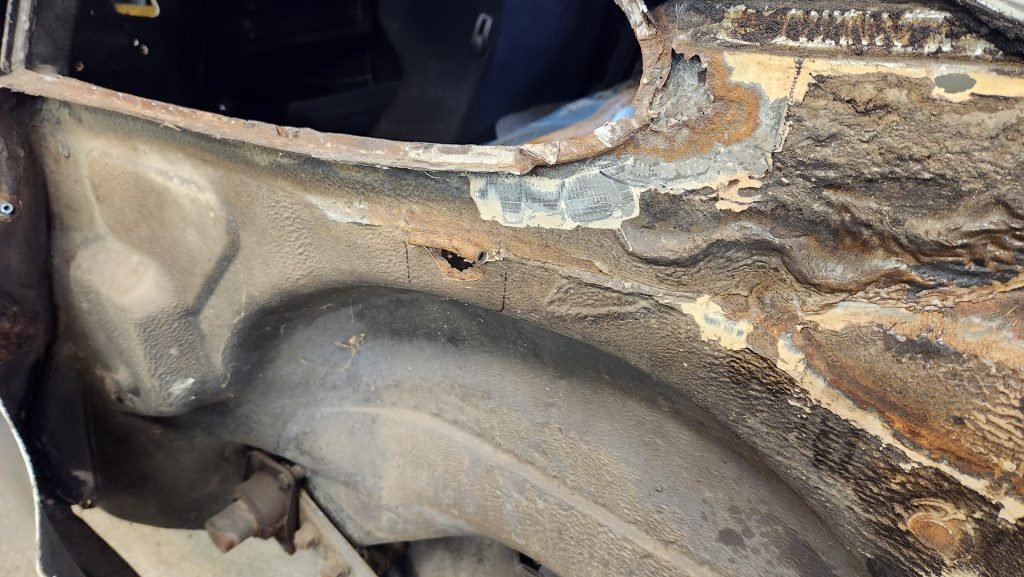
Tapping lightly on the bubbling paint reveals multi layer holes.

With the rocker extension spot welds cut and quarter partially cut away, note the previous not completed welded patch.

Test fit of the rocker extension.

And the under panels completed.
Spot weld the door jam to check for door strike alignment.
..and the top of the door jam panel spot weld.
This is the first fix of the quarter panel.
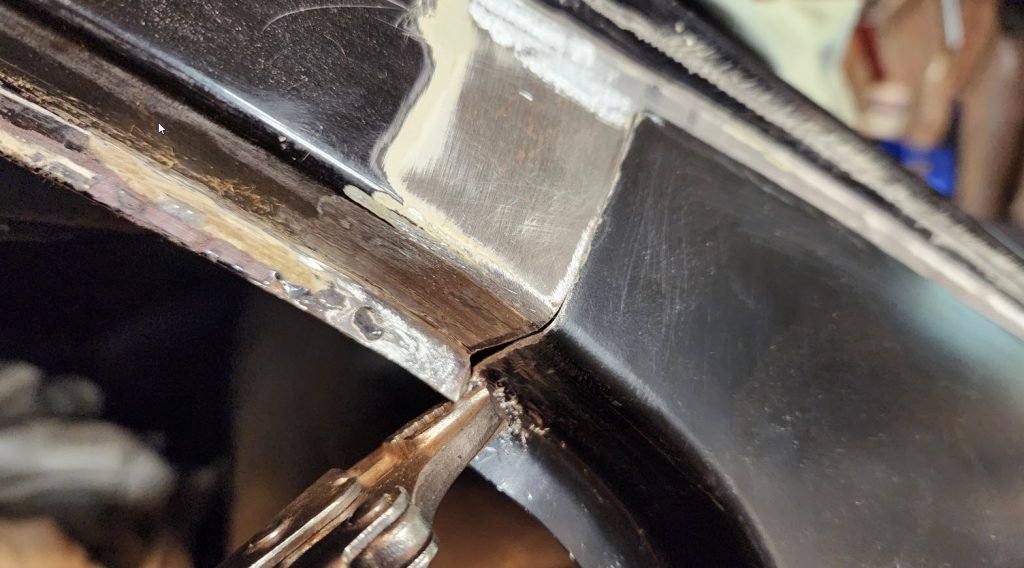
I thought I had the panel aligned properly but after taking a step back and looking at the rocker line the quarter was hooked inward. I used a flanger tool that turned out not to be the best method to join panels.
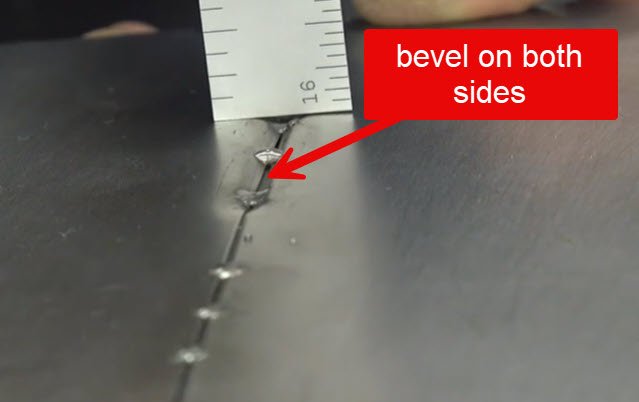
The tool makes a 45 degree bend which serves to add strength and provide a “V” for the weld. In the end it did add strength but so much that I was unable to hammer and dolly the high and low spots or change the line from rocker to quarter.
So I ended up cutting the weld and grinding the flange off and rewelding the panel so the line was straight.
Now the rocker line is straight.
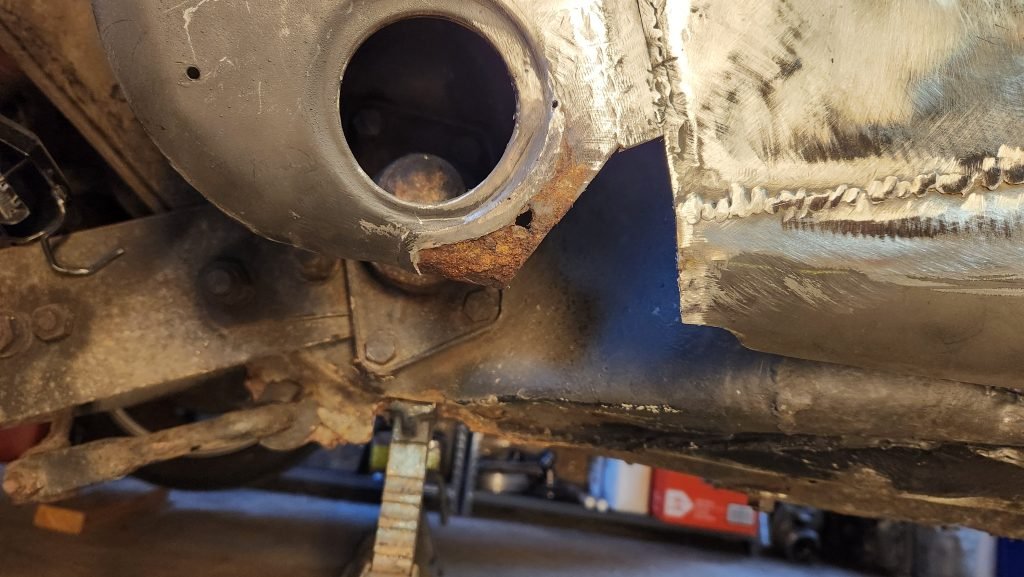
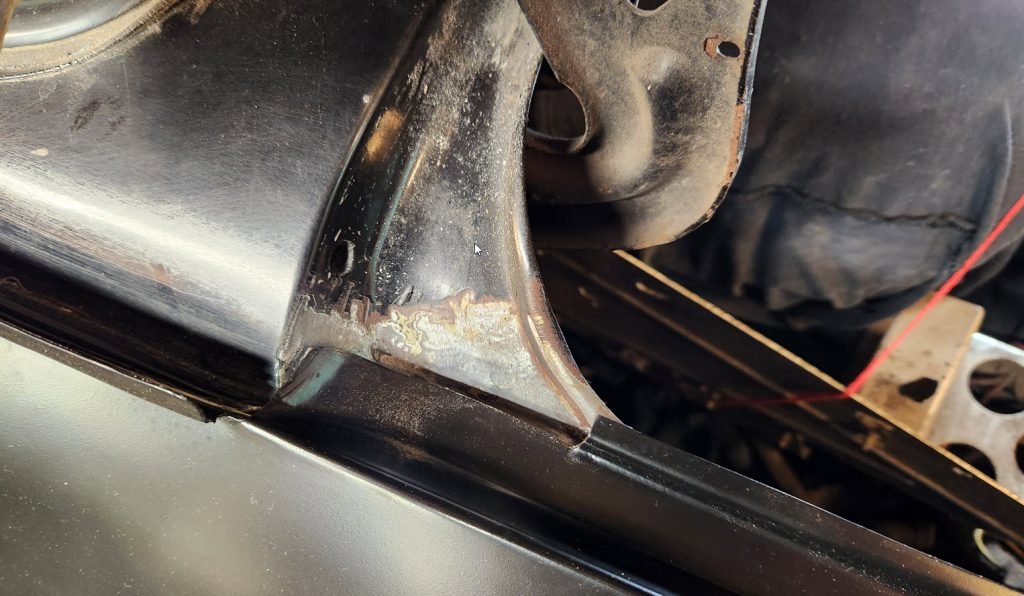
While grinding away on the redo of the panel I found another “fix” that needed to be corrected.
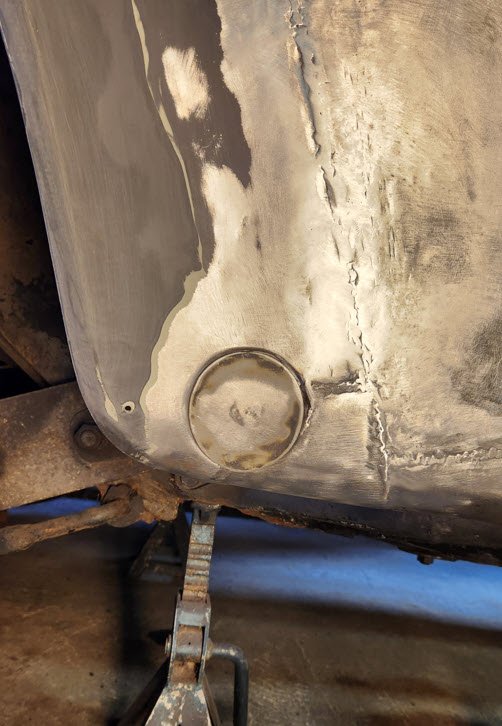
And the torsion bar access opening fixed. Probably should have done the complete quarter however good ones are now over $2000.
And another rust area that was hidden.
Finally the panel with epoxy primer!
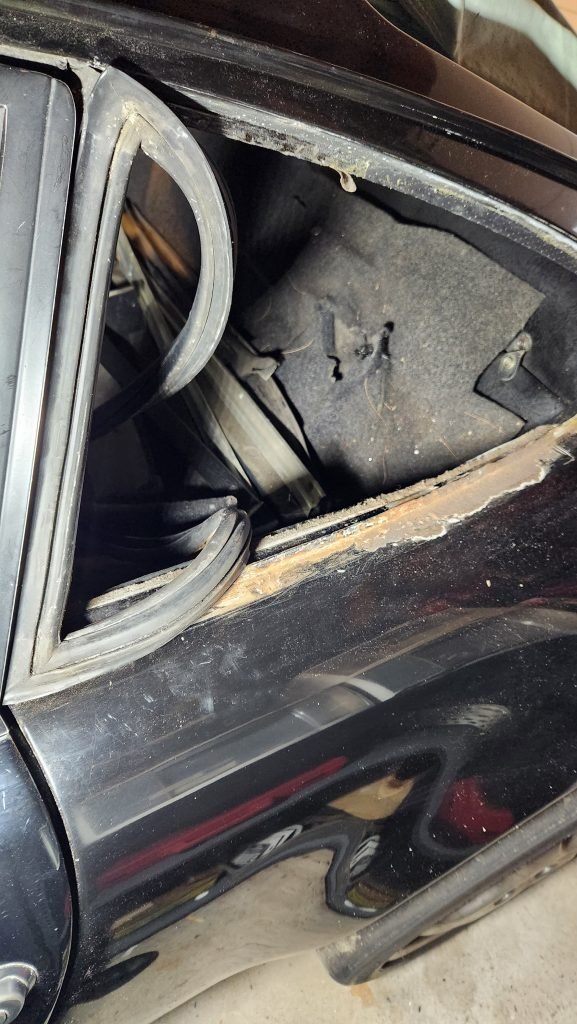
Left rear quarter panel
quarter window, inner panel, deck lid release tube, full quarter
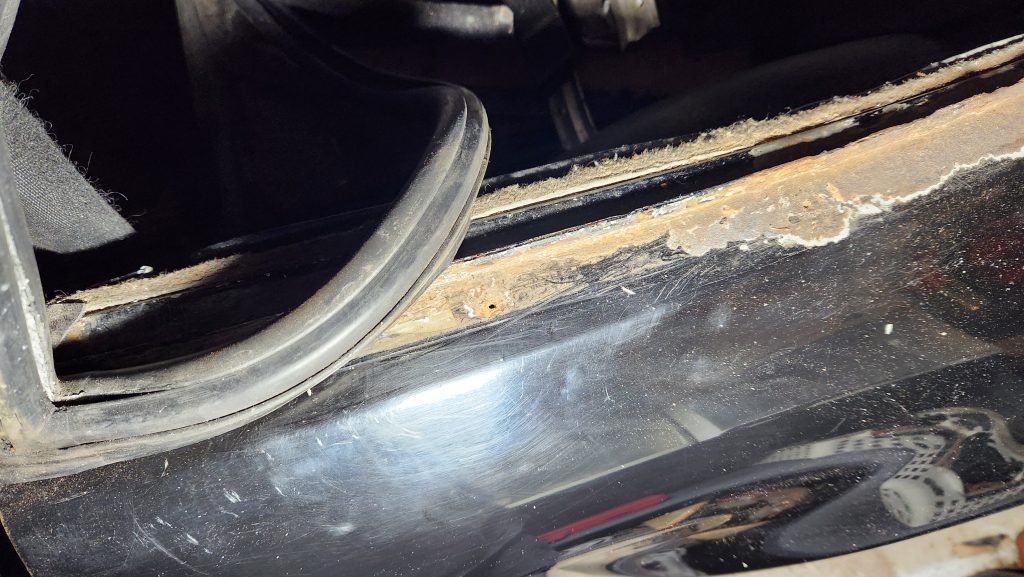
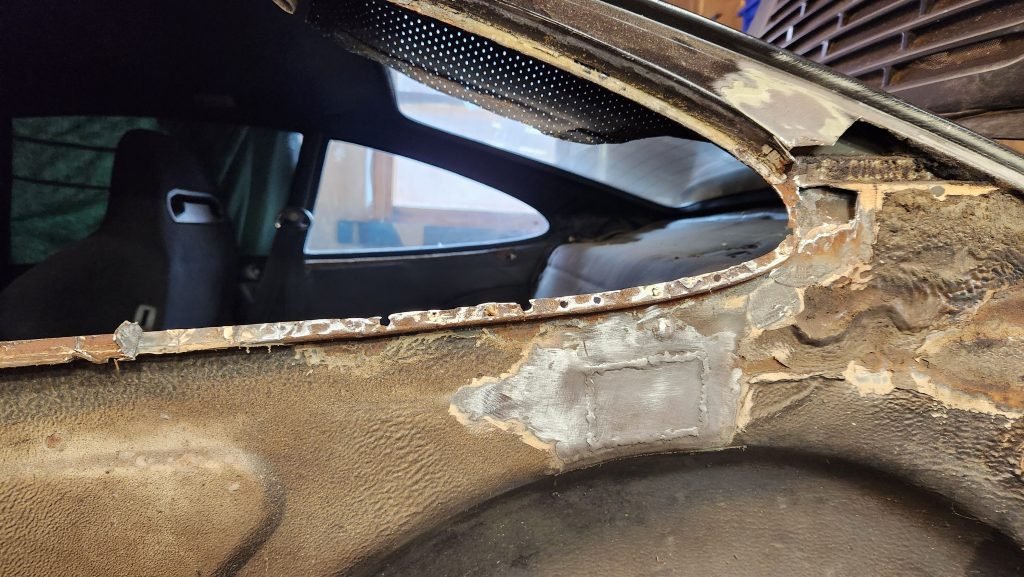
Note the small hole next to the release pull..the tip of the iceberg.
Looking up inside 2 holes at the back of the quarter window and at the weld of the lid release tube weld.
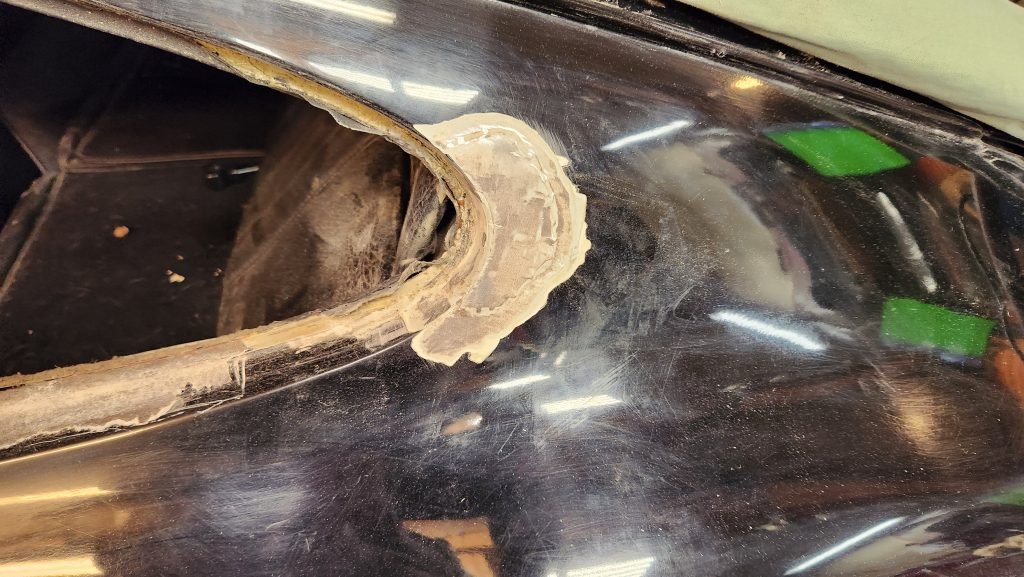
Grinding away finds a previous weld of the quarter panel and rust of the inner panel.
More perforations under the quarter window seal.
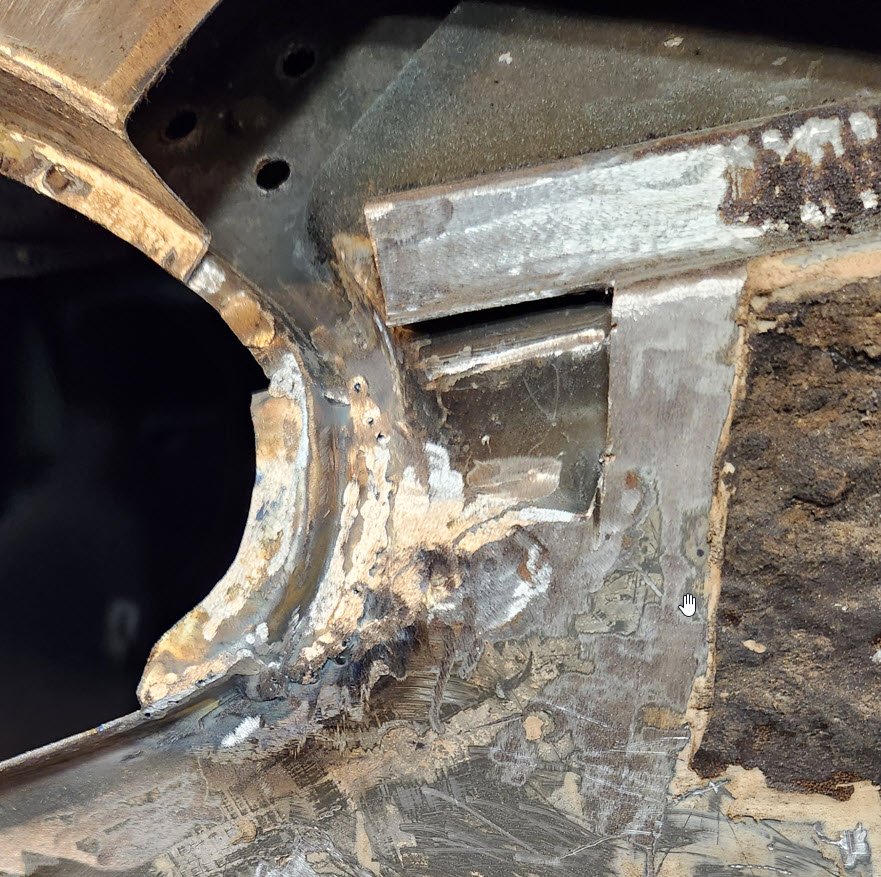
With the quarter removed the inner panel is perforated and the spot weld area is mostly missing.
Fabricated a bit for the rear support.
Made this one in 2 sections, many curves on this one and had to allow for the fuse panel to mount.
View from inside the engine compartment with fuse panel removed.
Ready to weld it up, this one took some time to get right. Making sure the deck lid, quarter and window would all fit correctly.
Drilling out the spot welds to remove the bits of the quarter found yet more rust holes here at the edge of the quarter window.
And that one fixed adding the channel for the quarter window gasket.
Wait..need to go back to the window, removed the window and gasket because there were some bubbles in the paint..
..pinholes.
And another bad repair, note that it’s not welded fully.
and that leads to, you guessed it rust.
And with the quarter removed more rust to fix.
Patch welded in at the deck lid pull tube weld and working on the window edge.
1 step at a time, rebuilt the spot weld lip.
Then the outer section.
And then the rest of the window frame.

Trimmed the attachment points and painted the bare metal, ready to test fit the quarter panel.
Check fit at rocker..
and at deck lid..
and the window frame..
and inside the tail light mount..

and at the rear crossmember. Keeping the measure many times cut once rule.
Test fit checking the door and deck lid gaps.
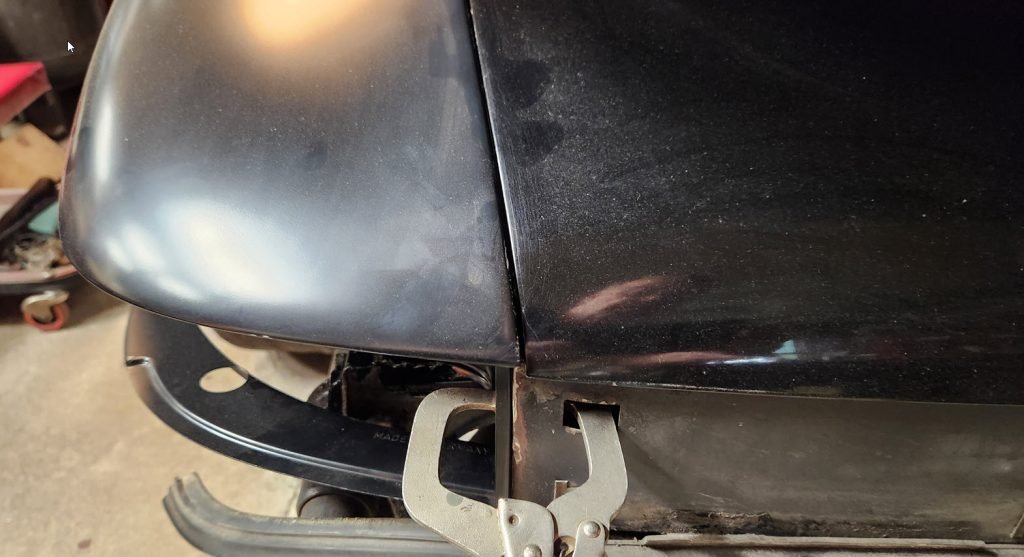
Deck lid gap looks good.
Need to add some to the corner.
Small adjustment to get the right fit.
Rocker fit and gap is good.
Alot going on here in a small space, quarter window gasket needs to fit, door edge gap, door strike (below) and the door gasket.
But first need to bend and fit the deck lid release tube.
Good fit for the corner area of the rear window.
Undercoated and ready for quarter install.
Starting the tack welding.
Note the electric spot welds around the window frame.
Starting the finishing process.
Got some shinny paint on to check the surface.
Rocker area looks good.
Starting the block sanding.
Some time later other work completed and expoxy primer. Now on the next area.
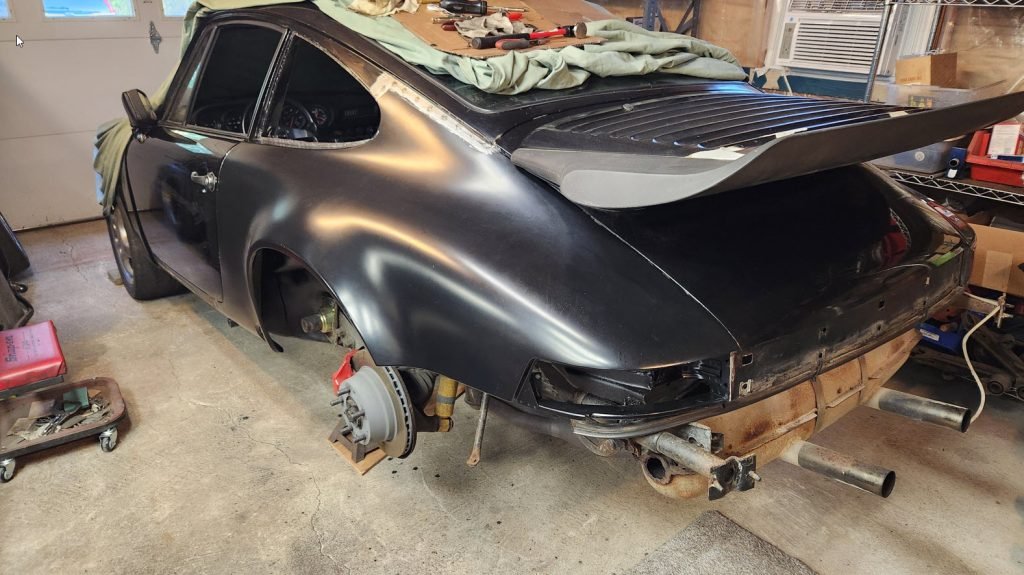
Tail and deck lid
tea tray tail and deck lid
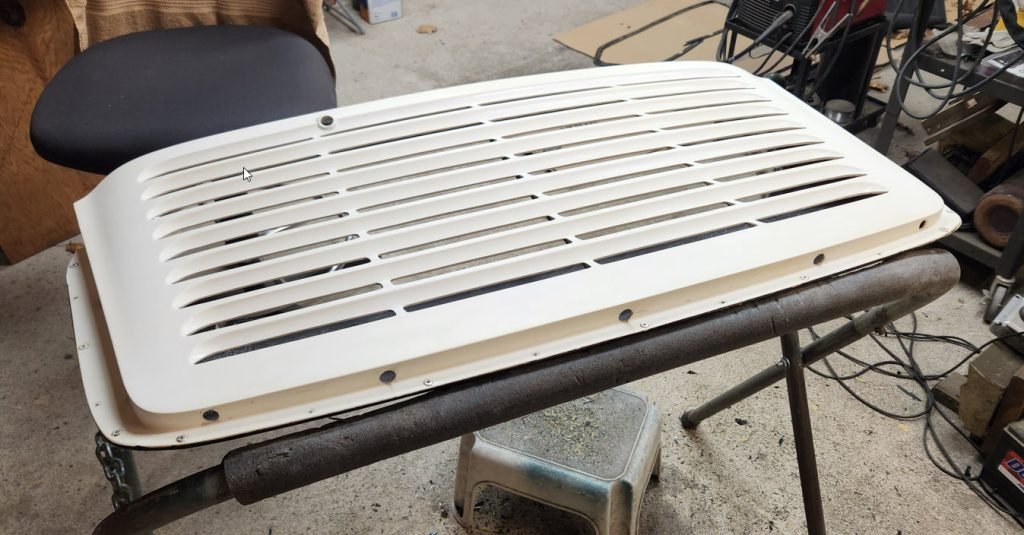
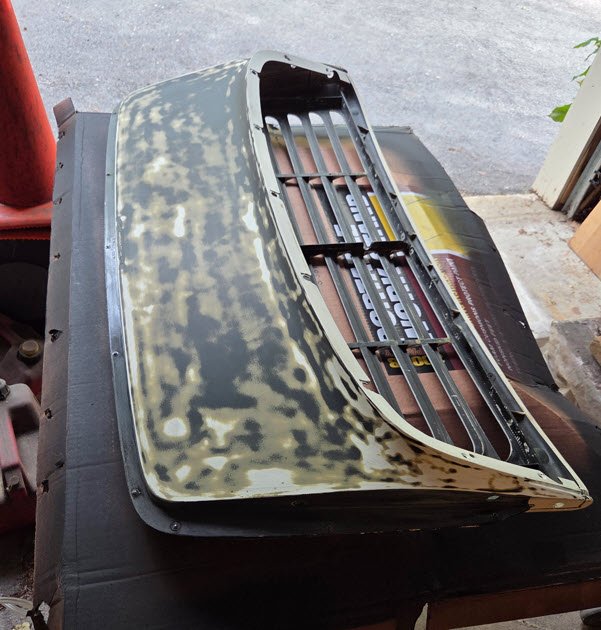
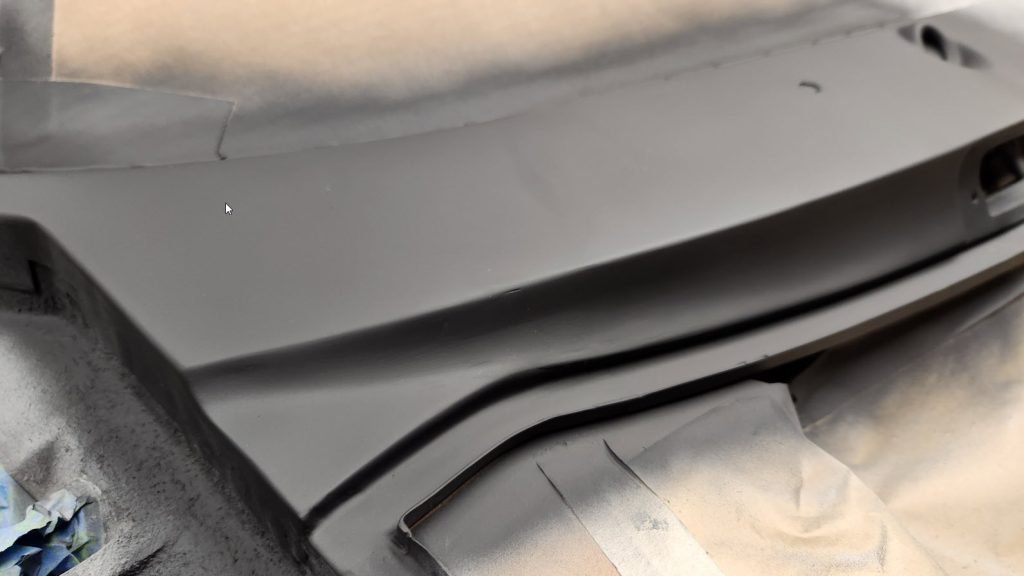
The paint was peeling off the top of the tail so needed to remove it all, so many little fins!
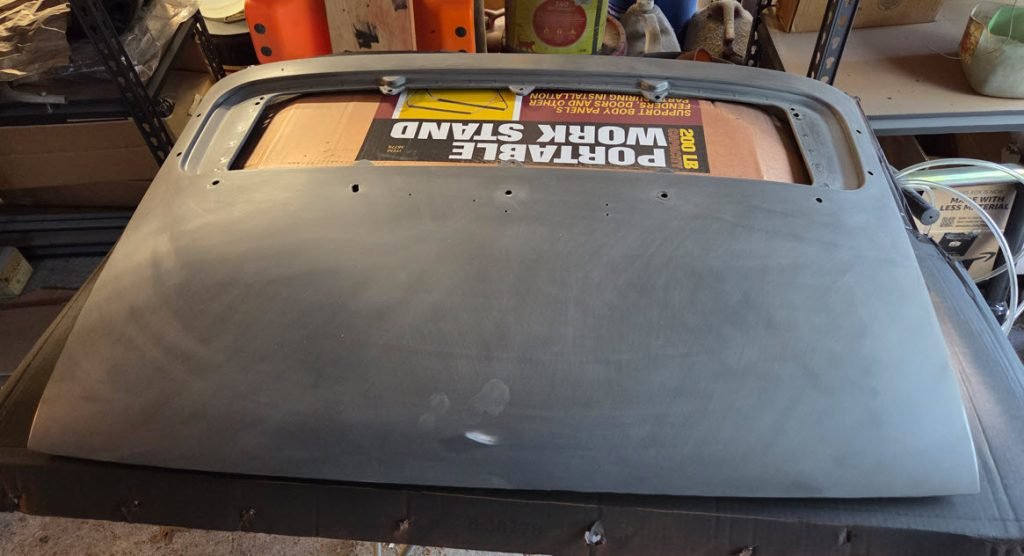
Sanded the deck and primed with expoxy.
Just a few surface rust spots on the underside.
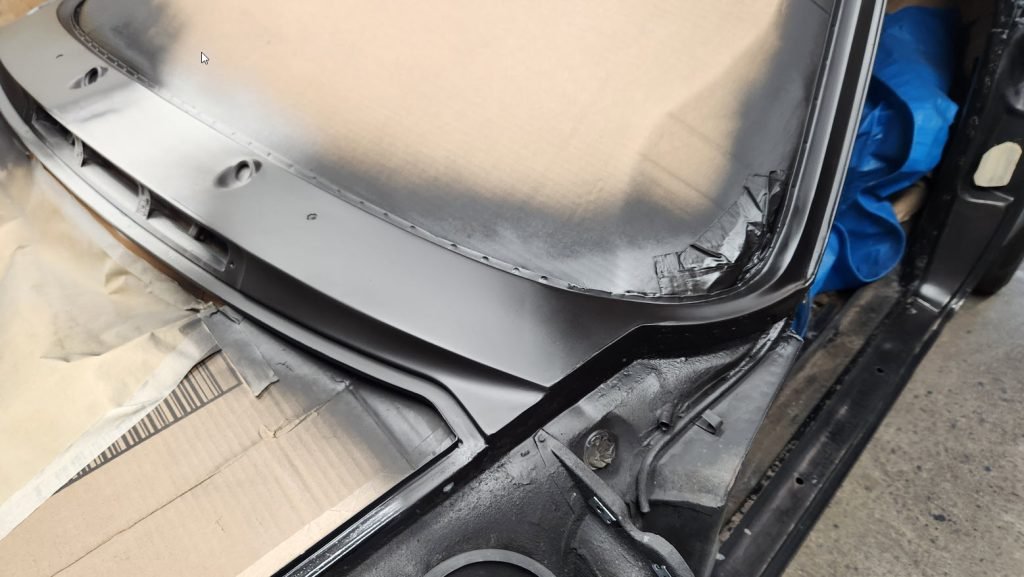
Same deal with the underside of the tail, remove all the paint.
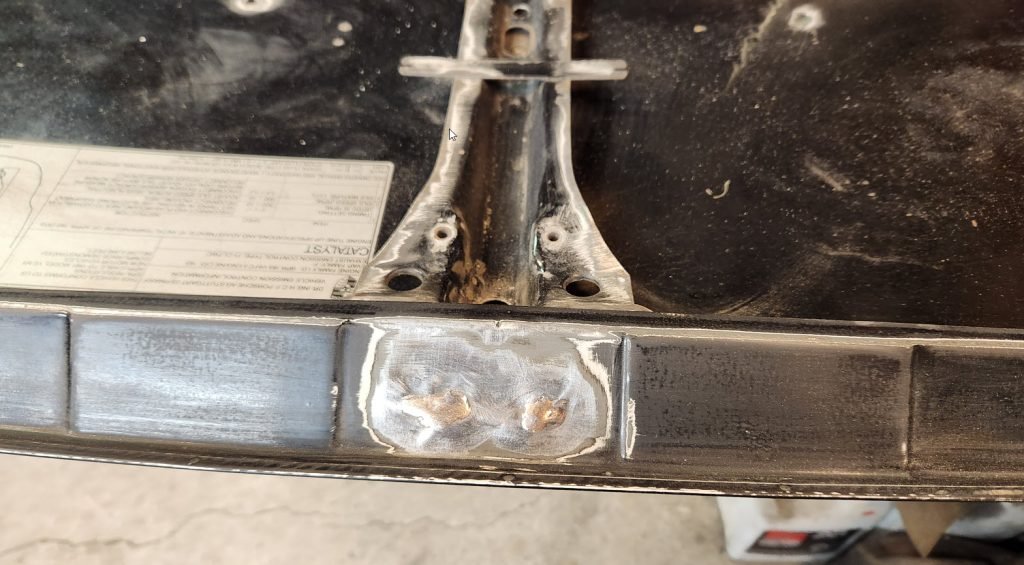
Neded to touch up the brazing for the cross brace.
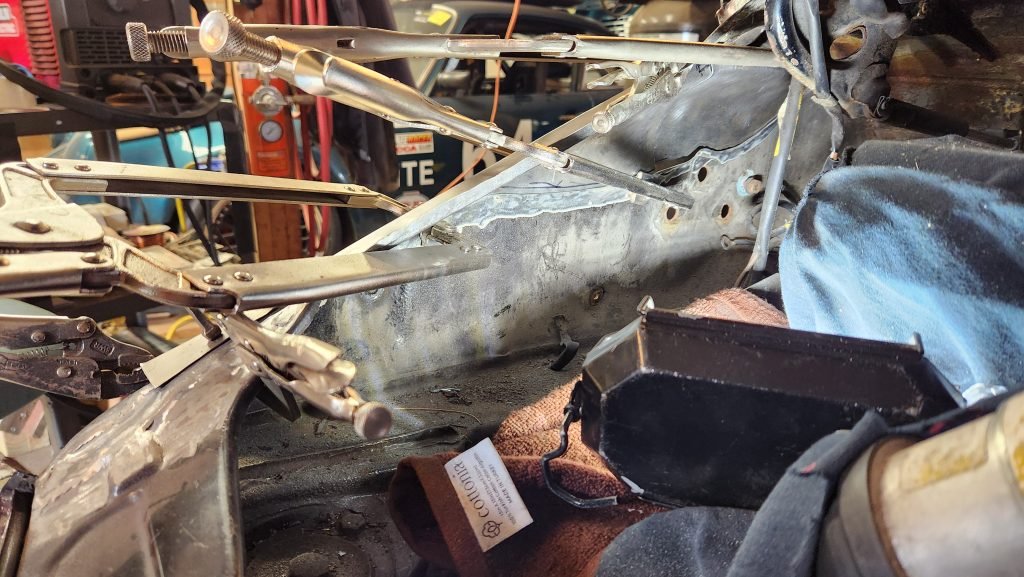
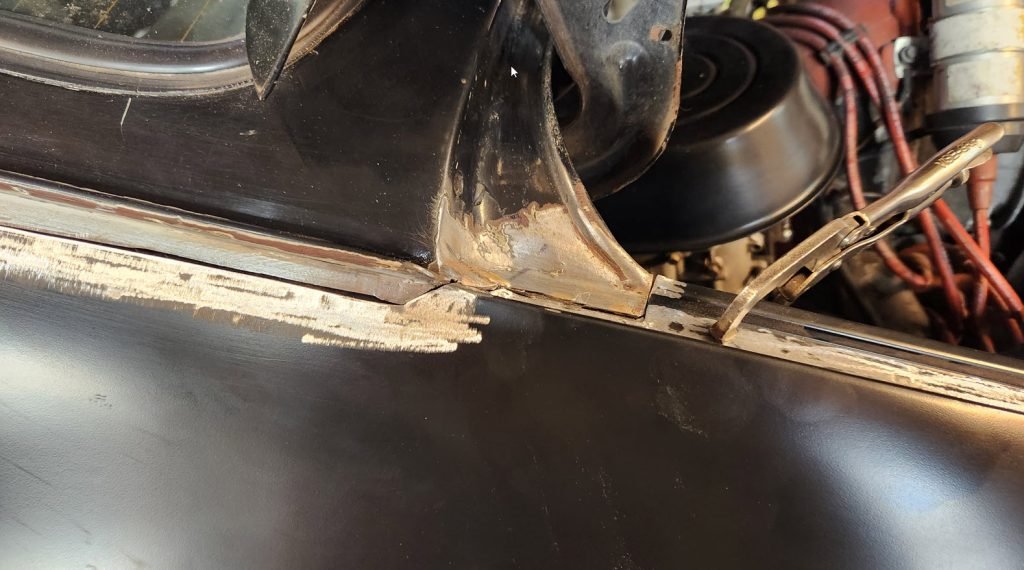
Windshield wings
Moving to the front of the car
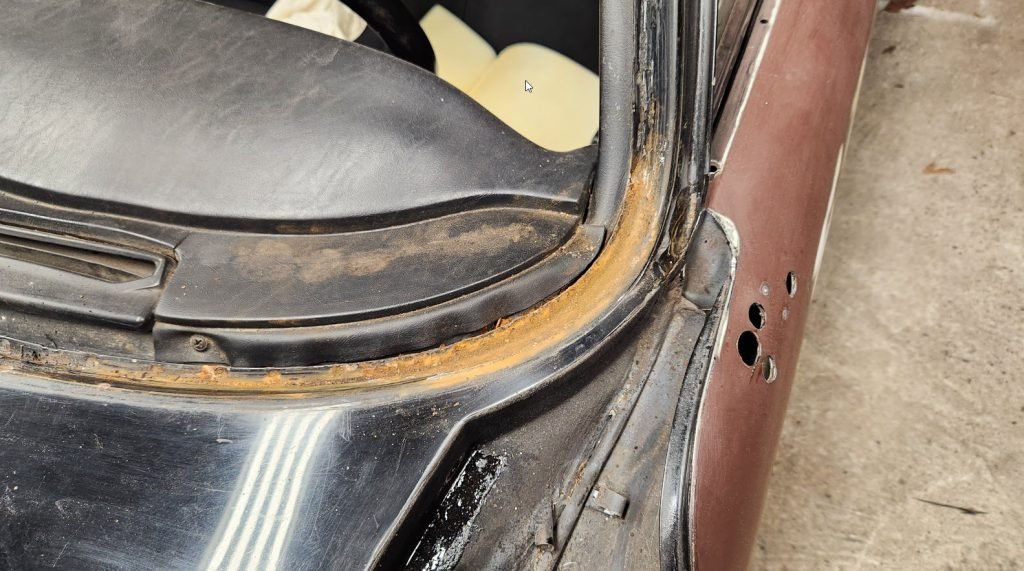
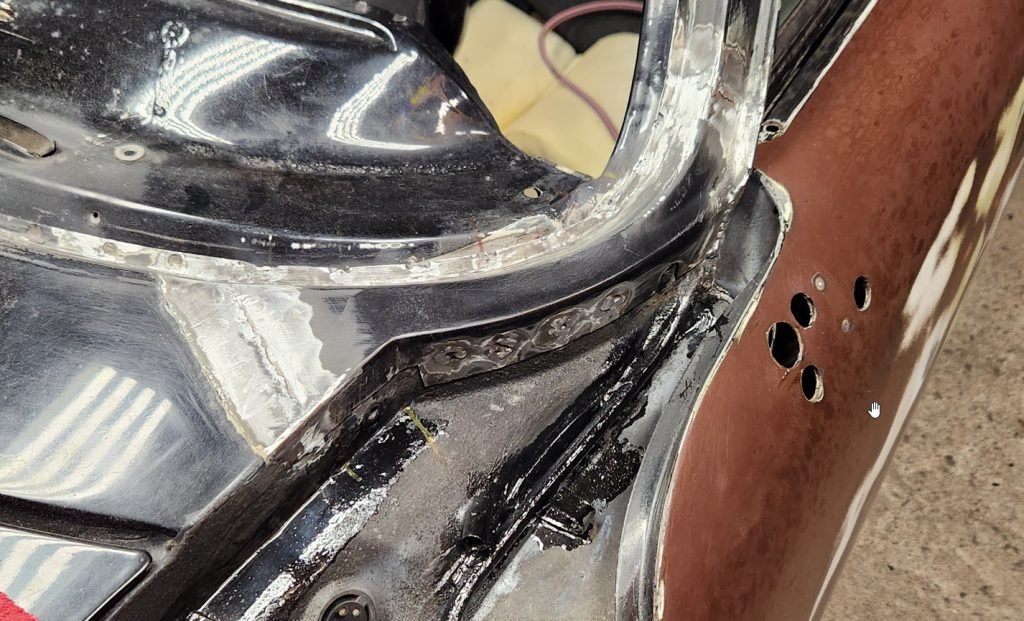
At some point the project changed from a partial restore to an everything off full restore. Once the other windows were out may as well go for it. The usual spots at the corners of the windshield.
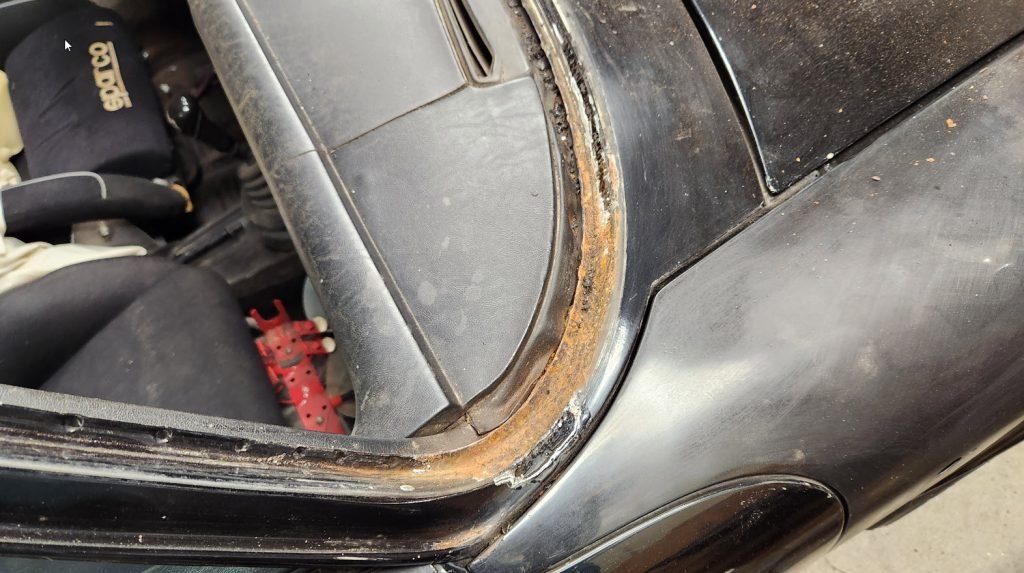
When the windshield gasket is not sealed water sits in the corners.
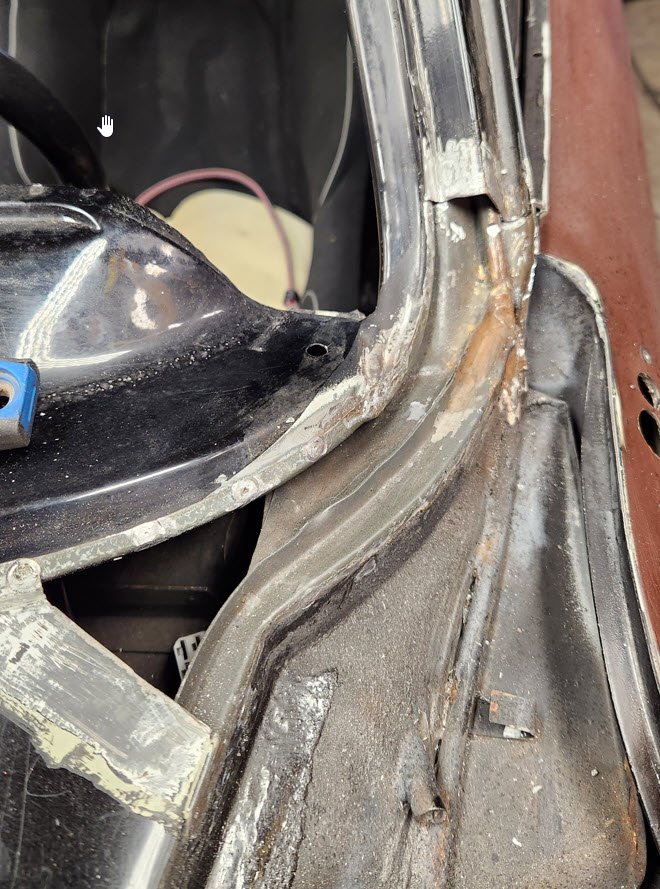
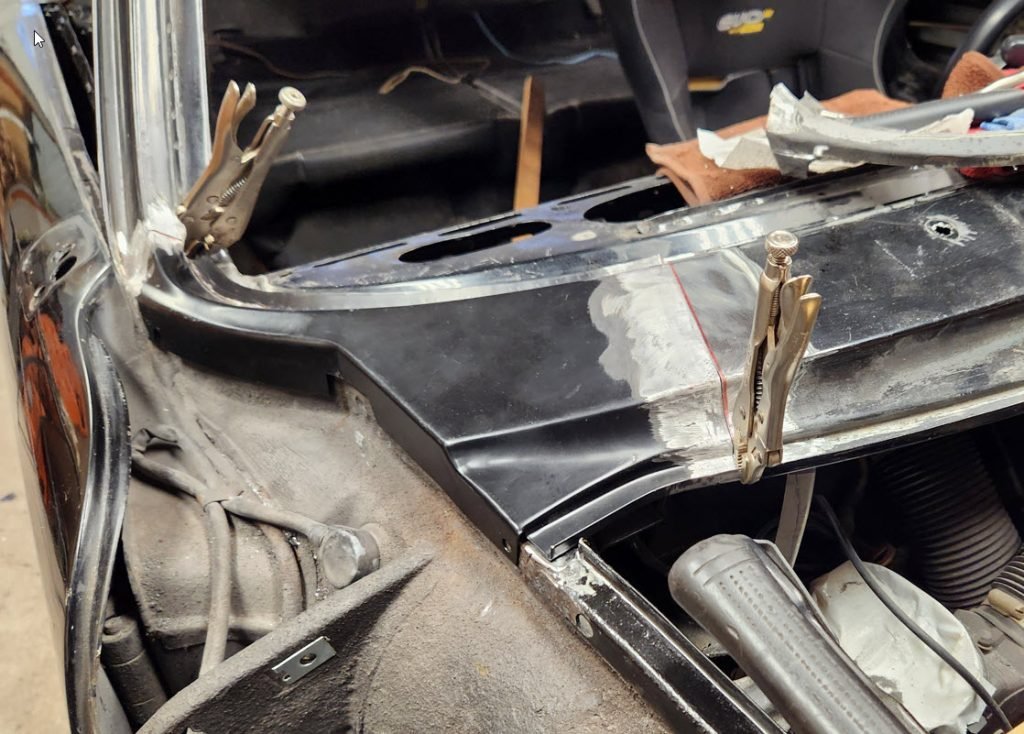
Left side opened up ready to fit the panel.
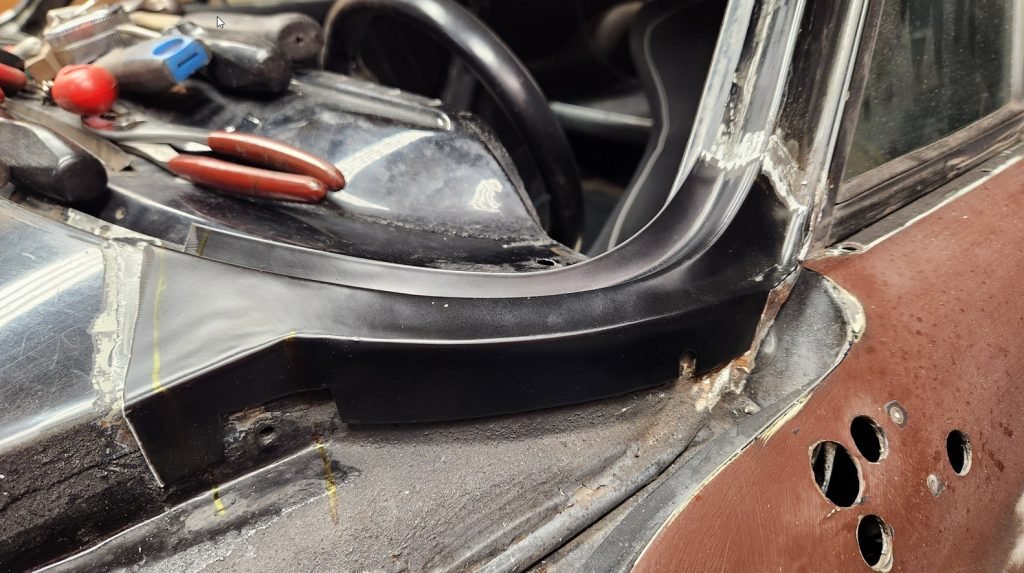
And again there’s a pre-made panel to weld in.
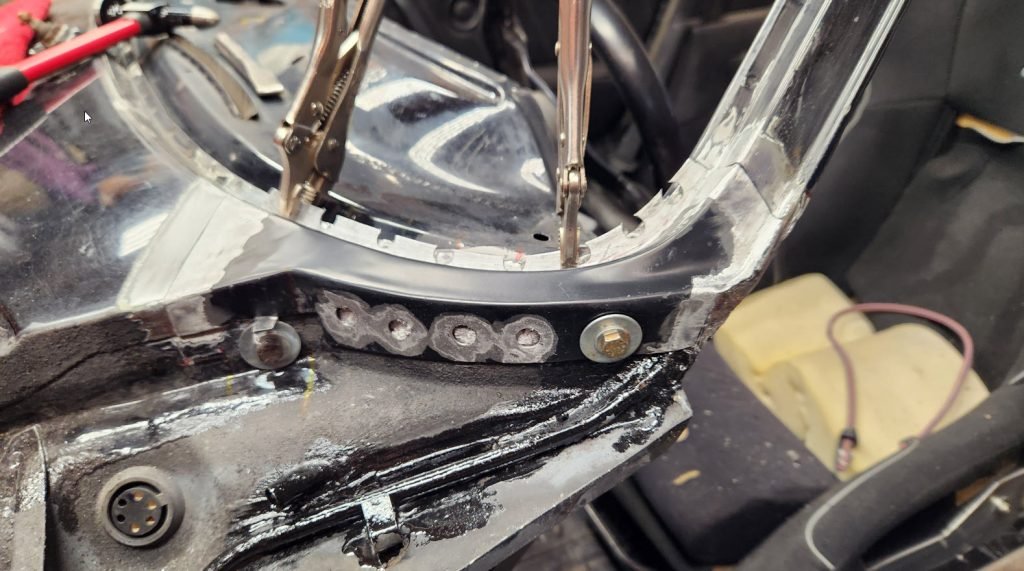
Drilled out some spot weld holes as the electic spot welder could not get in close quarters.
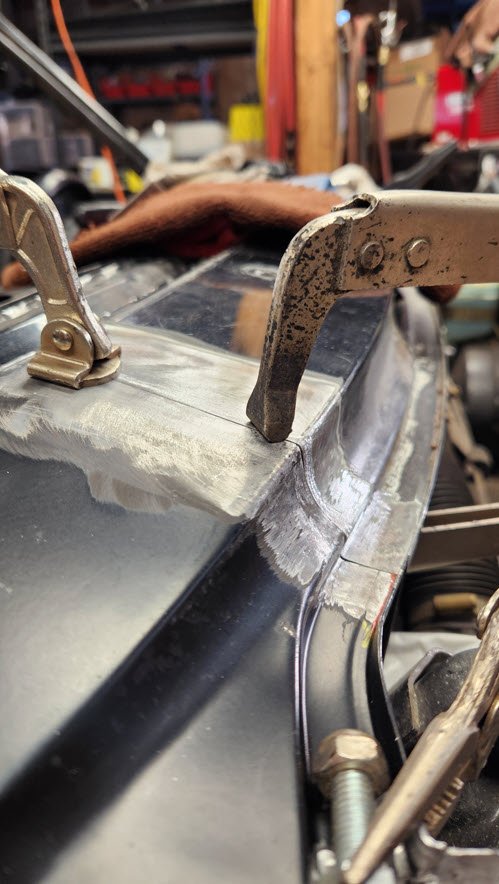
Seams welded.
Getting the fit just right.
A few bits need alignment here, the hood, weatherstriping, fender and of course the windshield.
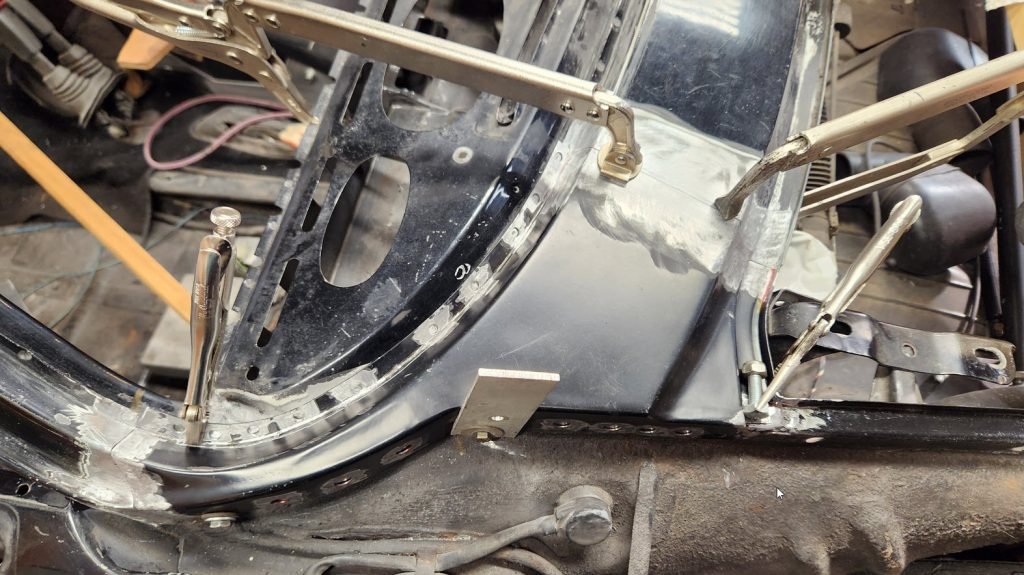
Ready to weld the right side.
Epoxy primer, ready to block sand.
And the left side too.
Doors
Door checks, hinges

Checking out the paint work on the driver’s door you can see evidence of print through or solvent shrinkage.
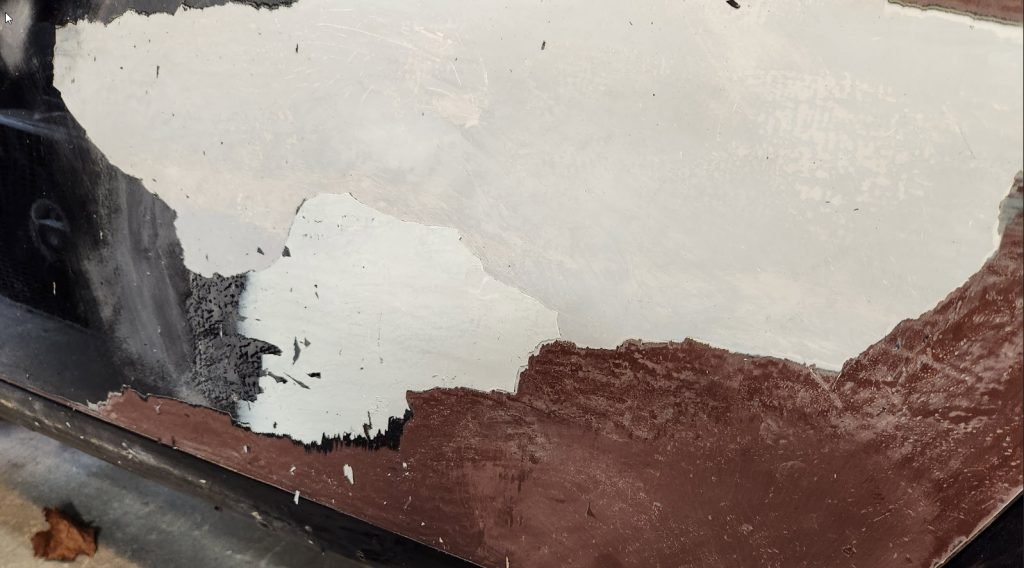
Scrapping down the paint reveal multiple layers of primer, looks like a ton of red lead.
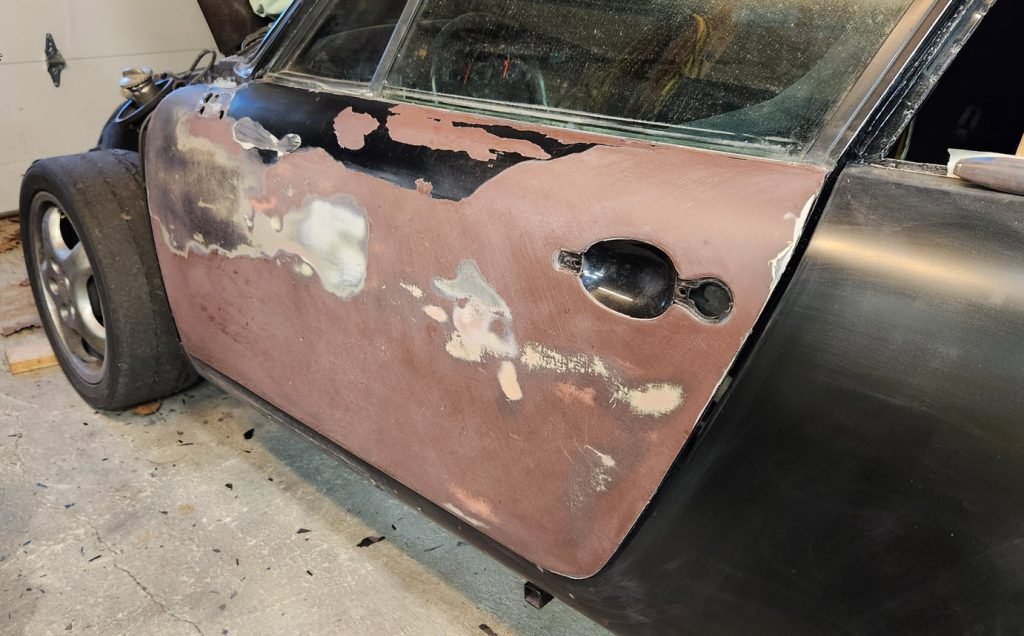
Sanding off all the layers.
After sanding this crack showed up, looking down at the rear of the door at window frame.
Cleaned up the area and very carefully TIG welded the cracks.
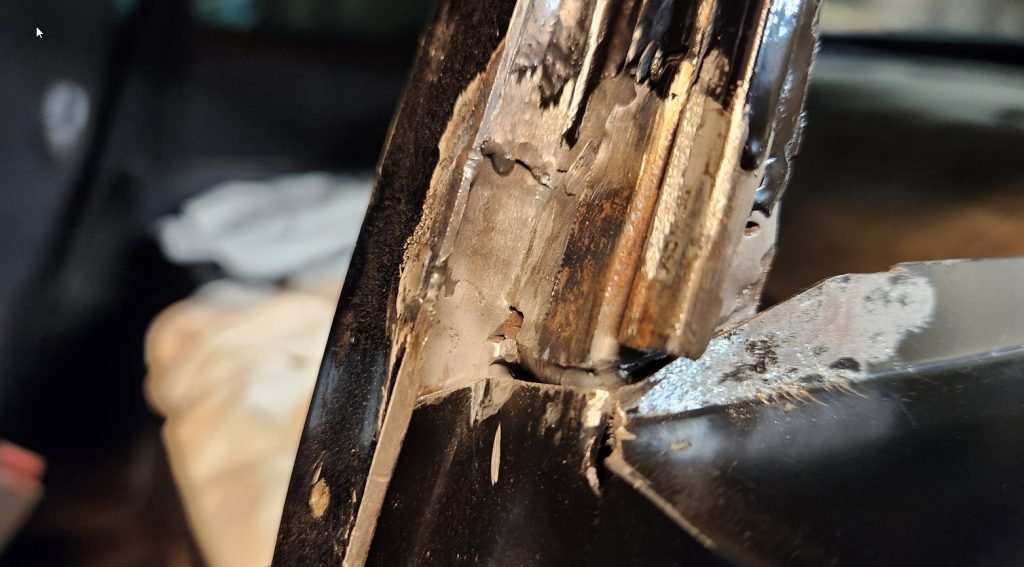
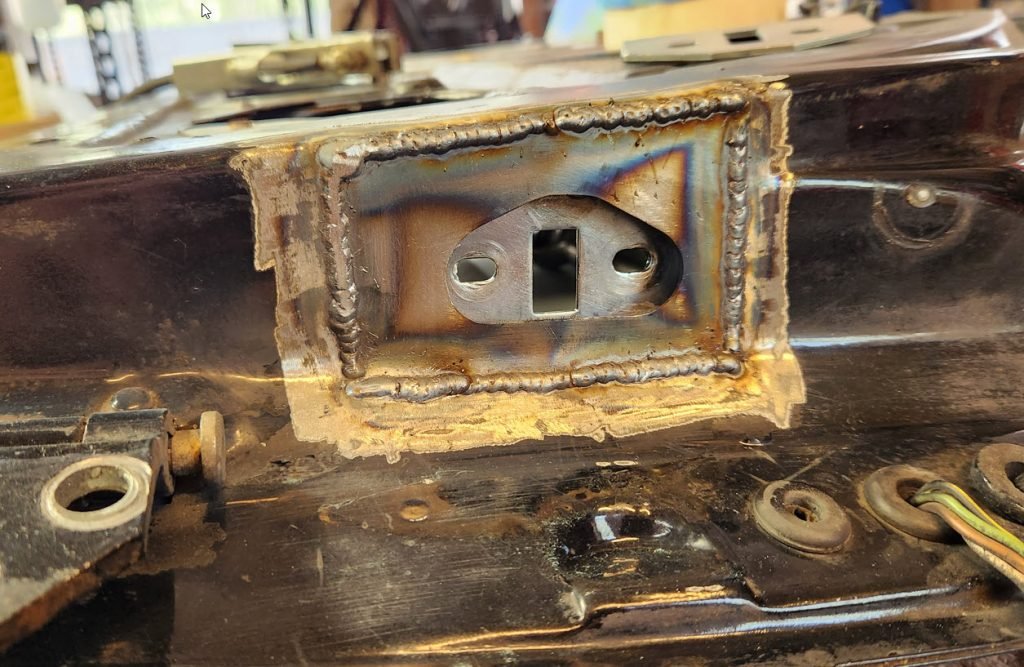
Inside the door the door check attachment point is destroyed by repeated opening and closings with loose bolts.
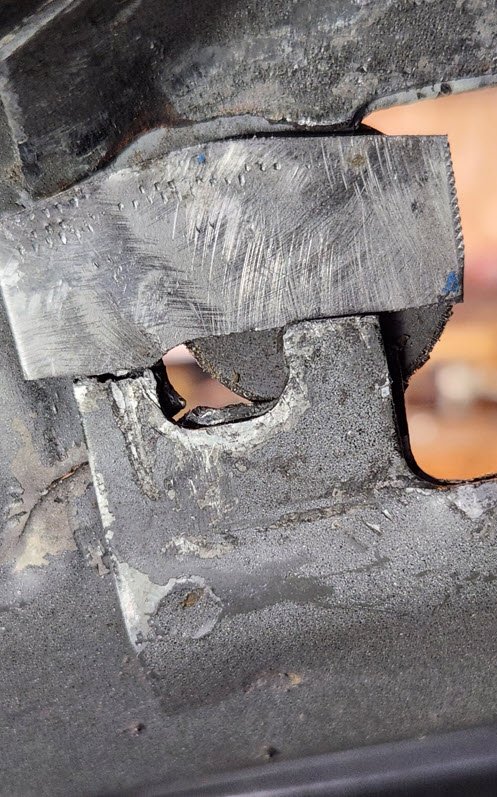
Needed to cut back the outer layer in order to straighten out the area and weld in the reinforcement plates.
With the outside removed there’s room to work.

Bringing it back into shape.
Fabricated a piece to fit on the backside and then the tricky weld from inside the door. Note the round magnet holding the piece in place.
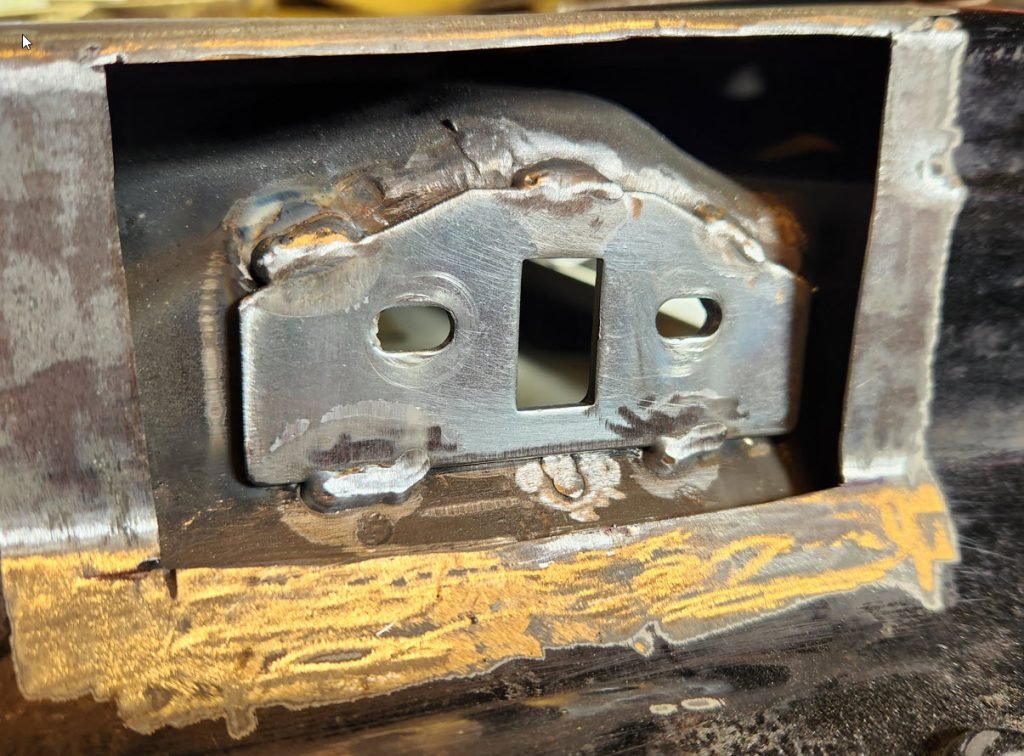
Welded in the reinforcing plate.
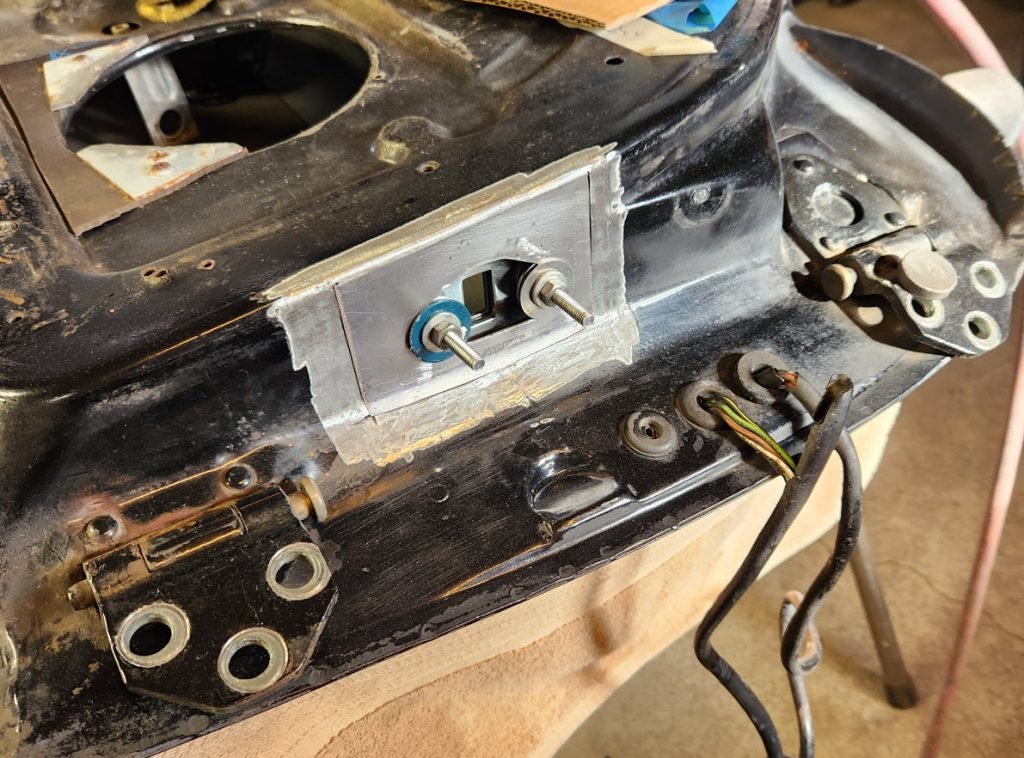
Made a standoff with 2 6mm bolts and fitted a new plate.
And the inside reinforcing plate.
And all welded up.
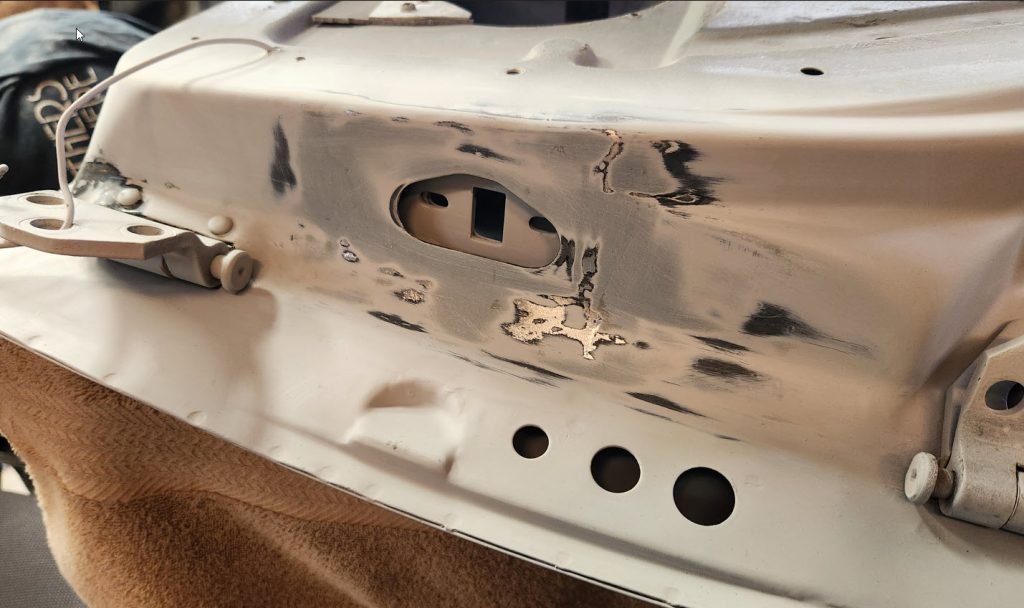
Ready for epoxy primer.
Starting the block sanding process, note the darker low spots.
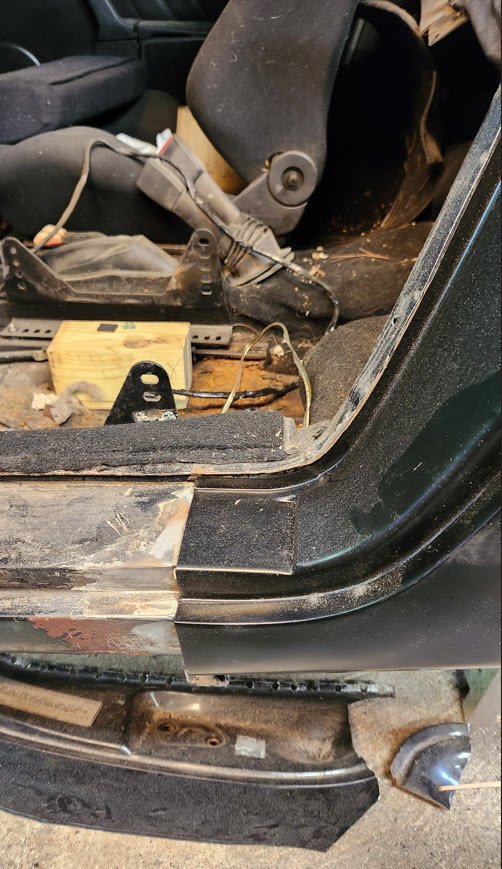
Floor
Alternate seat mounts, floor patch
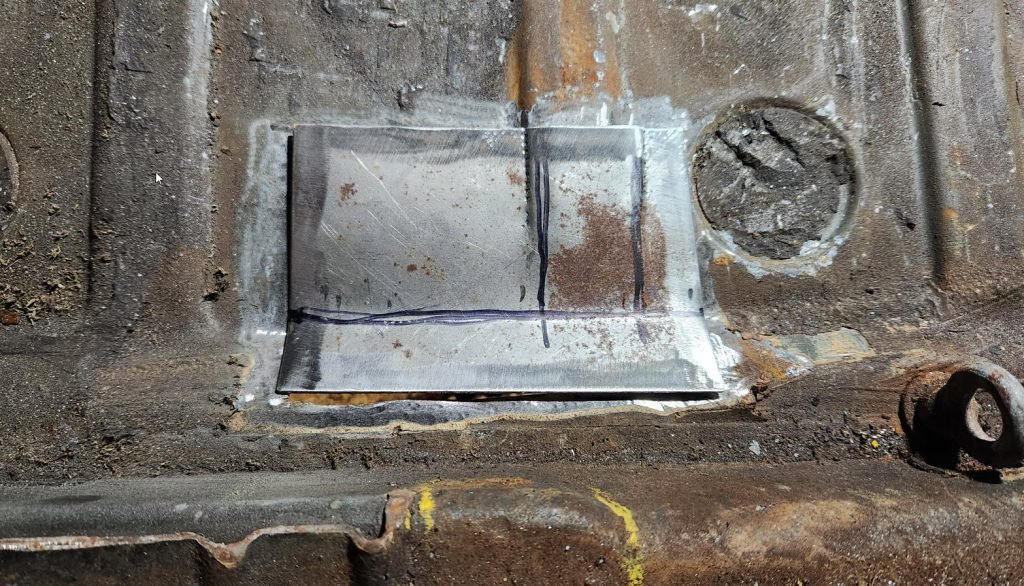
Fabricating a patch to follow the bead.
And welded in.
Cleaned up and painted.
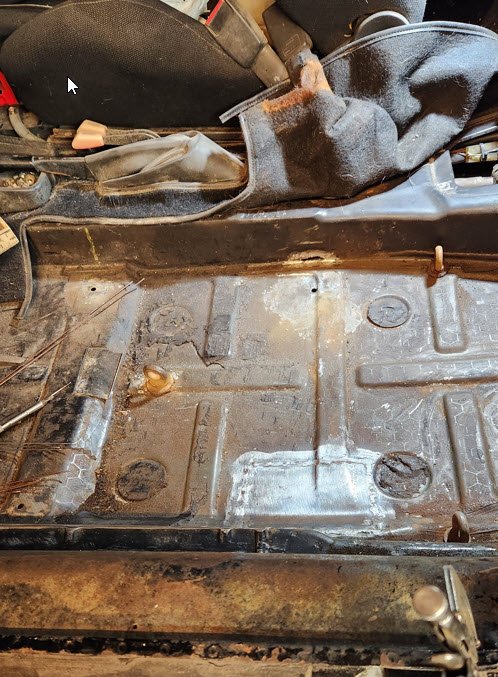
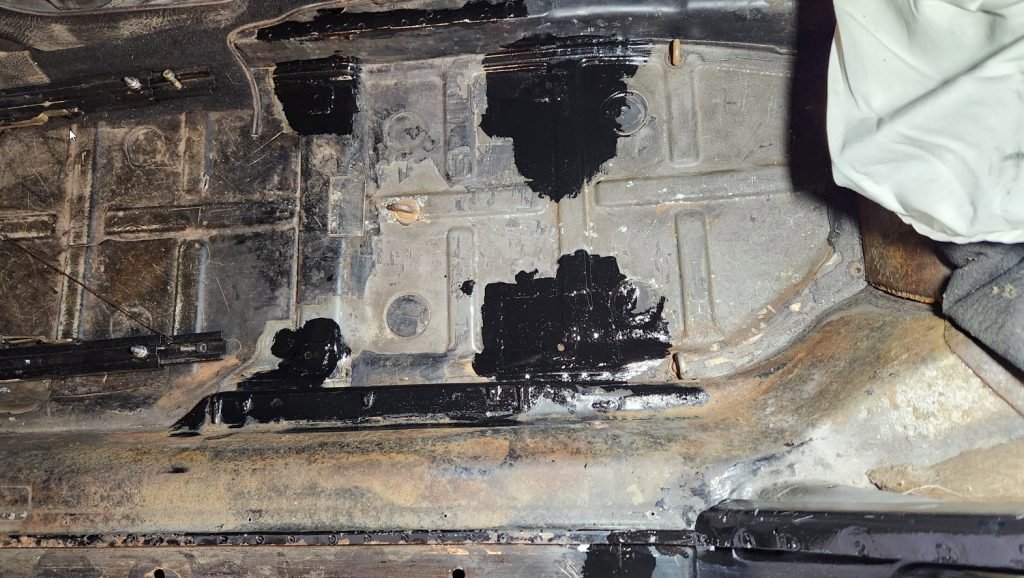
Needed a way to mount the original seat and a race seat. The original mounts were cut to allow for more headroom. Fabricated a removable mount. Welded 8mm nuts to plates for attachment.
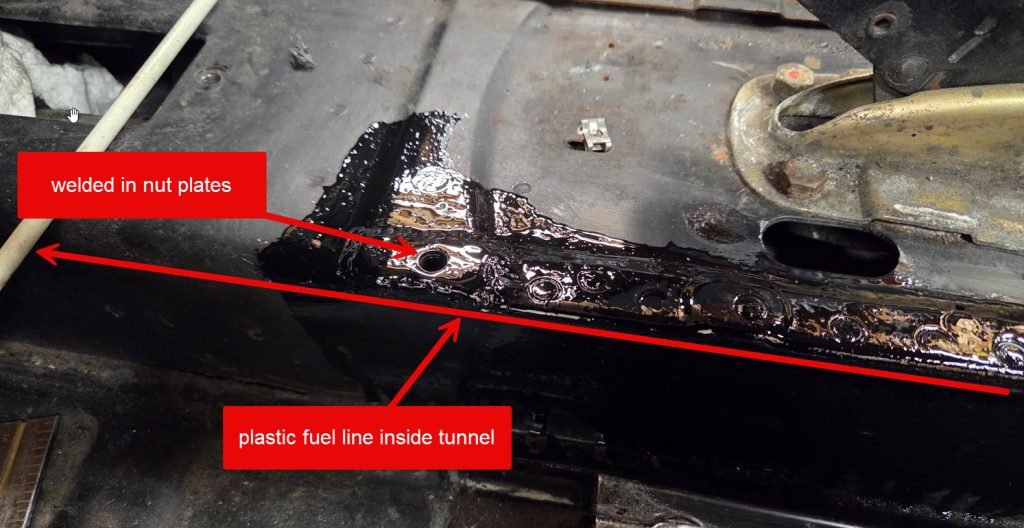
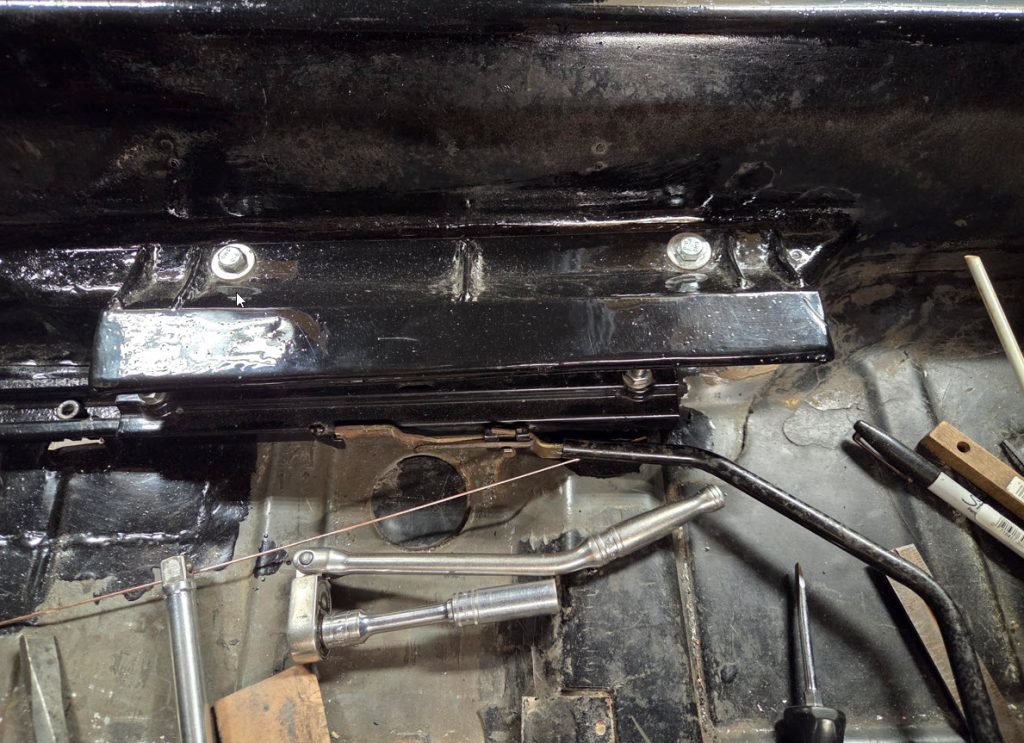
In order to weld in the nut plates the plastic fuel lines needed to be removed. Originally the car had CIS fuel injection and now has carbs. The fittings at the rear were seized and needed to be cut so had to replace the lines.
Rear valance
Alternate seat mounts, floor patch
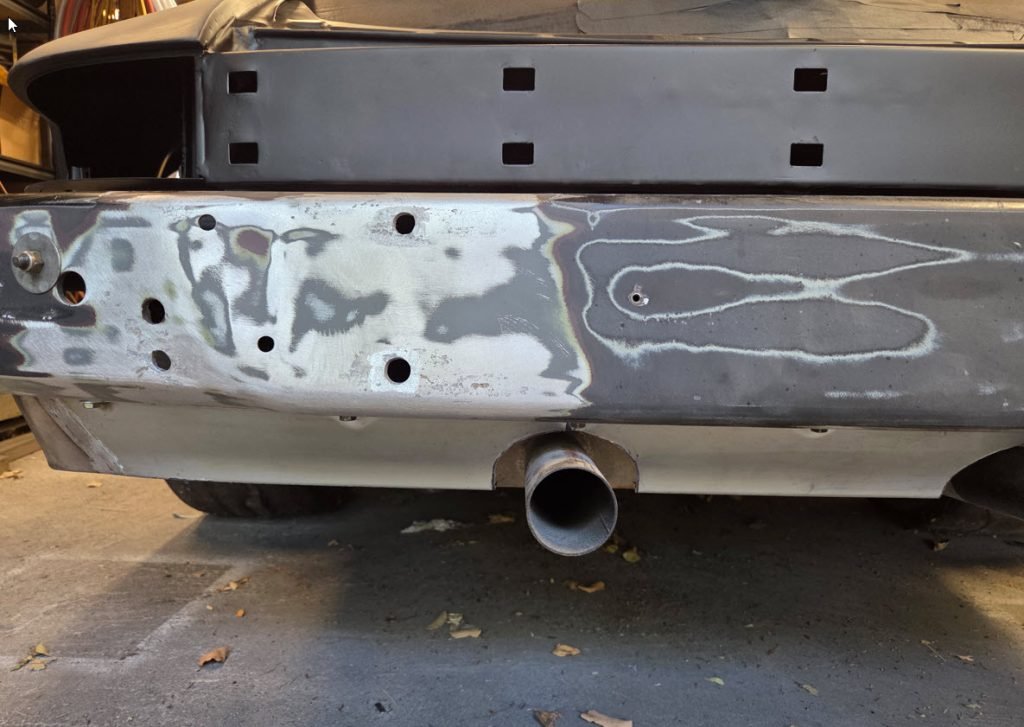
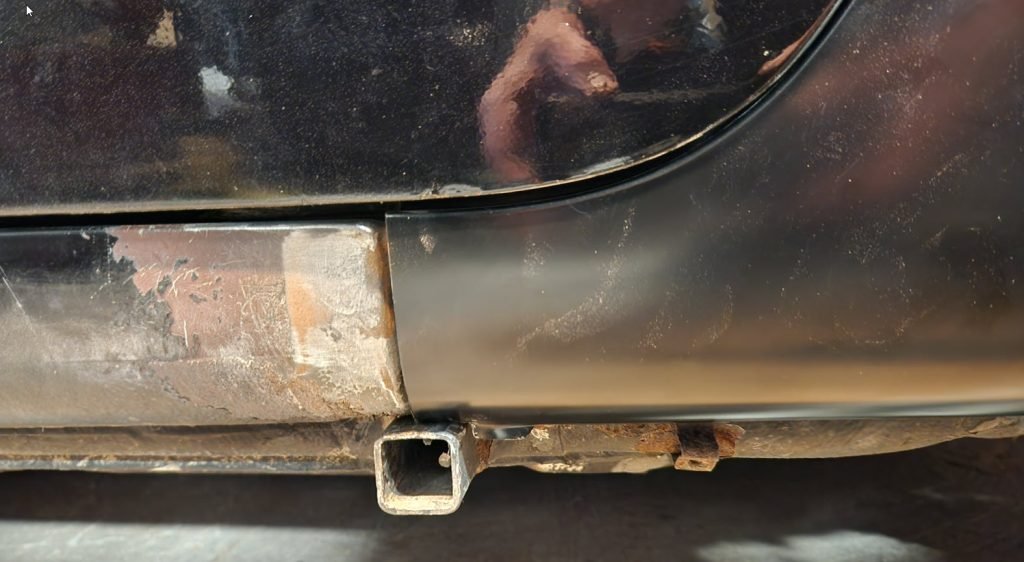
Modifing the rear valance for the dual exhaust outlets.

Fabricated the extension of the original exhaust outlet.
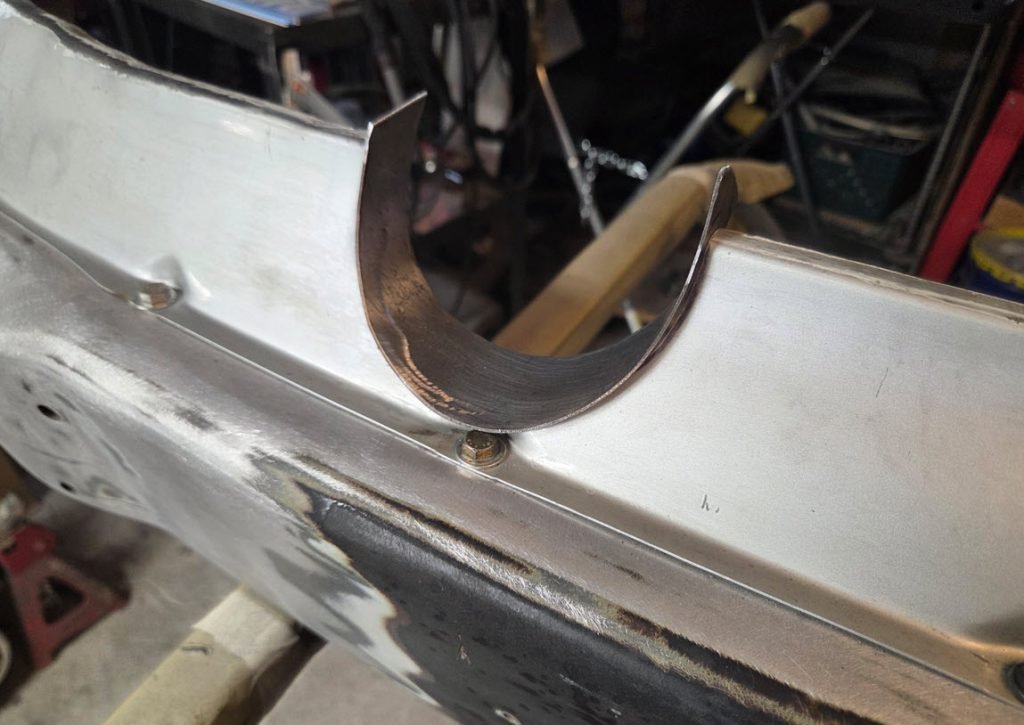
Fabricating the opening lip.
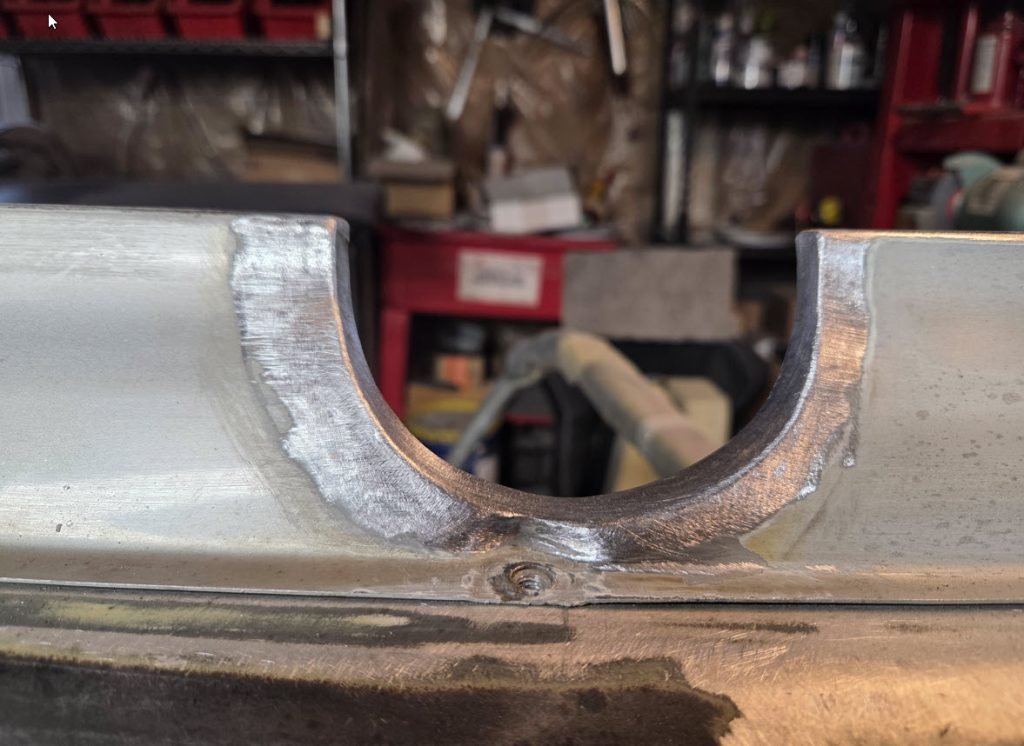
Welded in the lip and cleaned up.
Front cooler
Mounting, lines
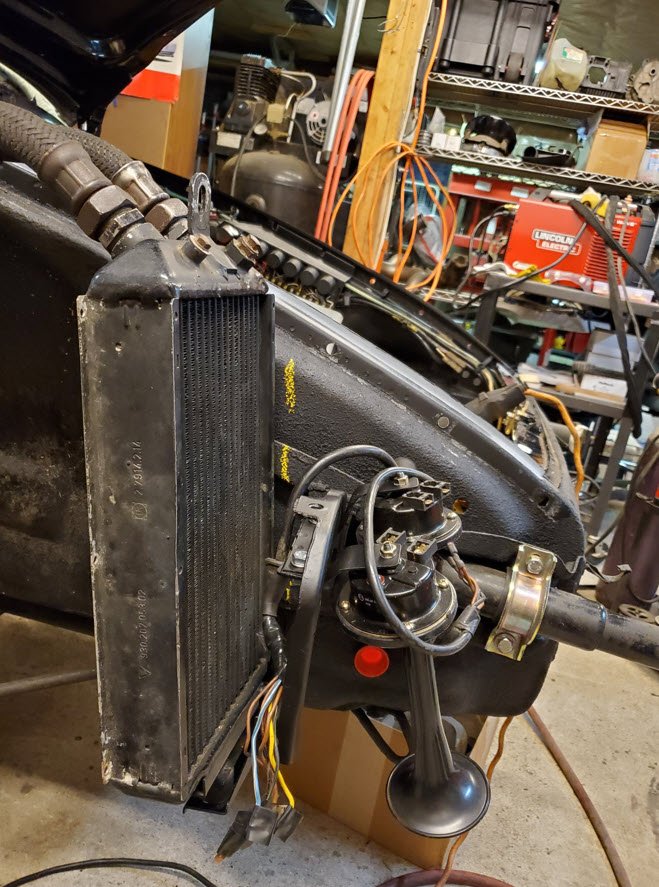
A very busy area, mounting the cooler to the new inner fender.
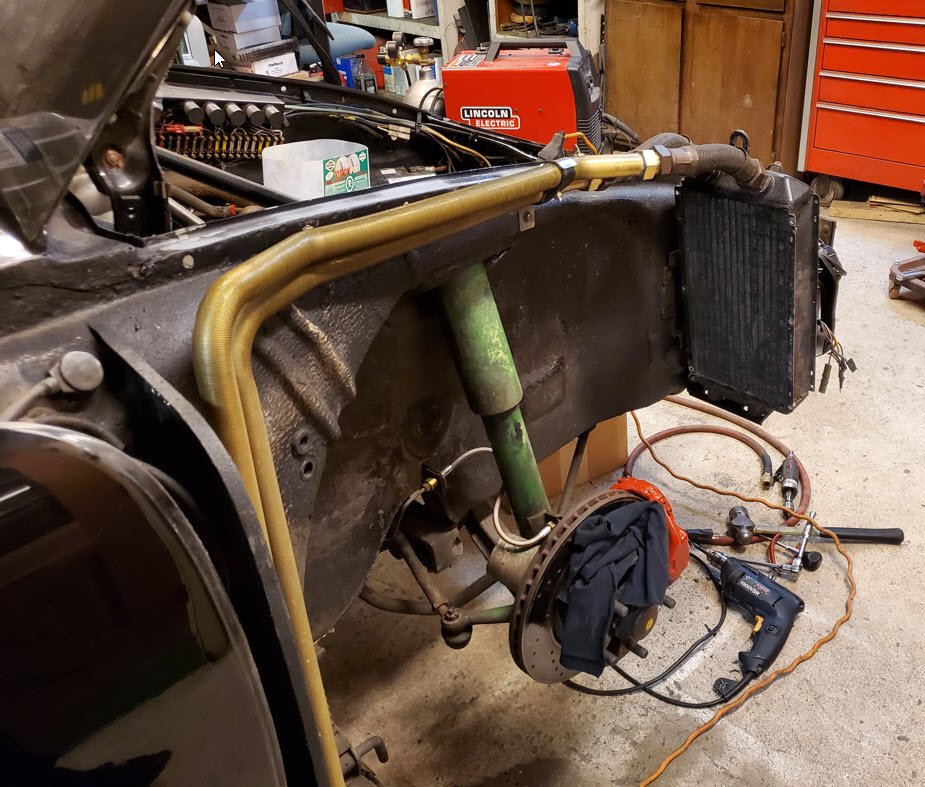
Test fit of the new lines and cooler.
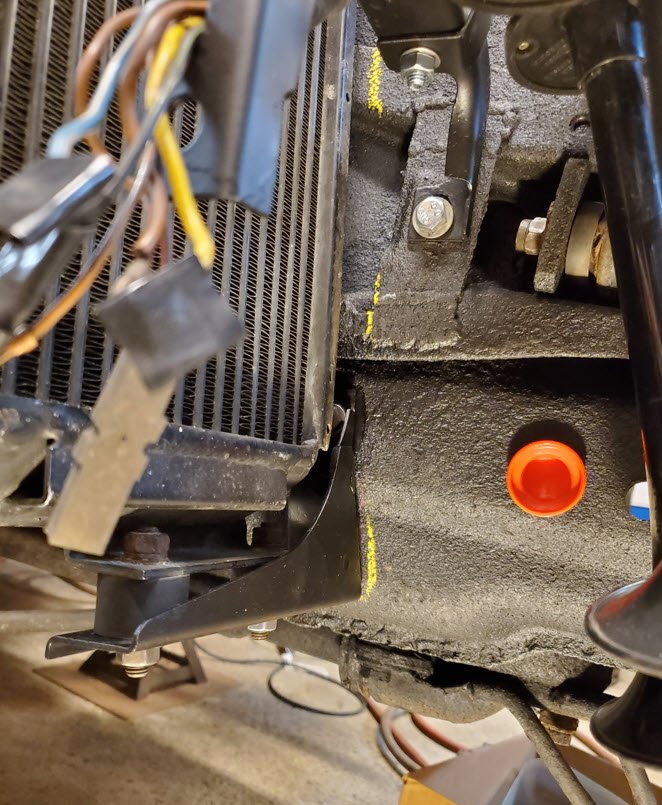
Attaching the bracket to the inner fender.
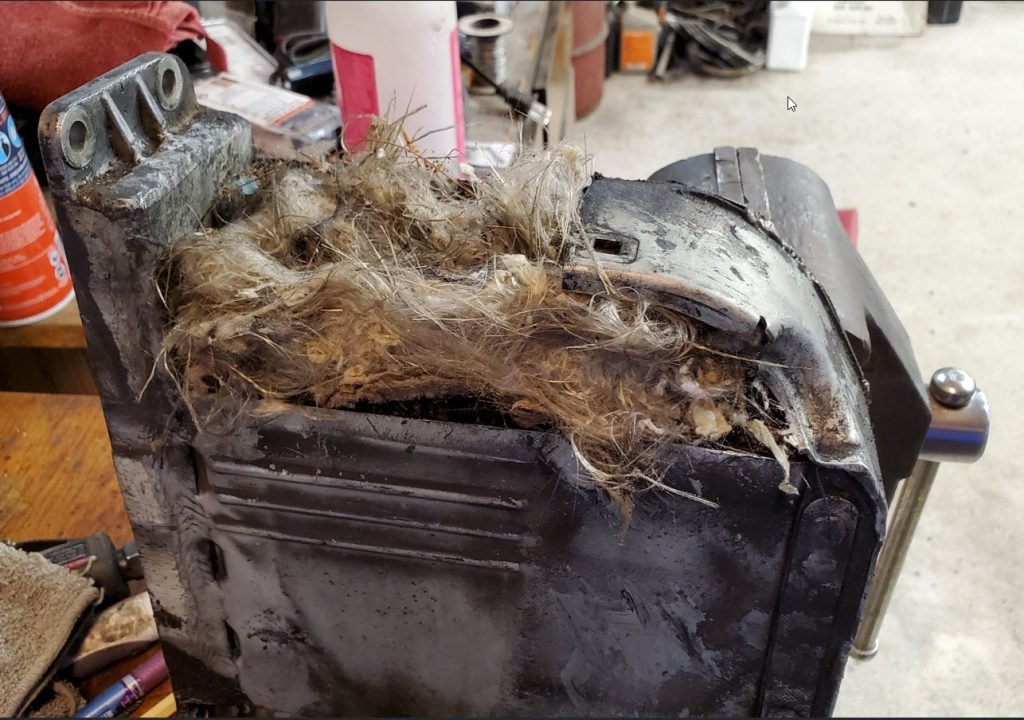
Once I got the lines installed and fired up the engine I noticed an oil leak and was able to sneak the internal cooler out with out pulling the engine but found something had made a nest in there. Not much cooling happening!
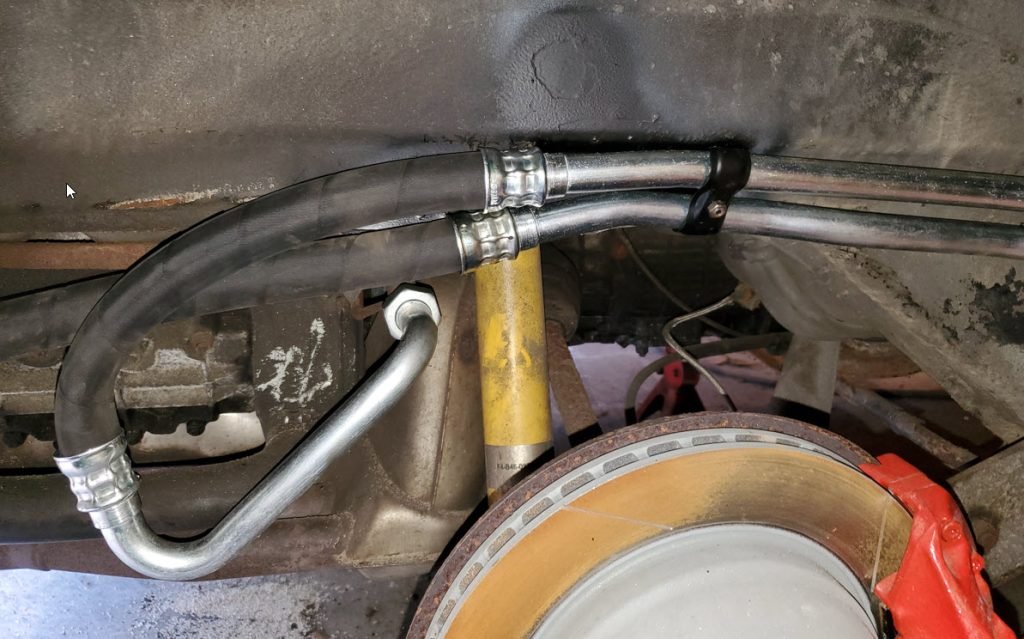
Welded a 6mm stud to attach the oil lines bracket.